Wednesday, March 27, 2013

Make your own self raising flour

Make your own self raising flour - (metric grams and U.S. cup versions):
  • Sift together 1.5 teaspoons of baking powder and a quarter of a teaspoon of salt per cup of flour in your recipe
  • which if you prefer is 5-7 grams of baking powder (about a teaspoon), and 1 gram (a small pinch) of salt for every 100g of flour.
Source for the baking powder ratio: Harold McGee in On Food and Cooking: The Science and Lore of the Kitchen.

Self raising flour, or self-rising flour as it's sometimes less gracefully called is plain, all purpose white flour with the raising agents already included, along with salt. The raising agents used in self raising flour vary depending on the brand but all include a dry acid component along with an alkaline base, that react to produce carbon dioxide bubbles that leaven the batter - Odlums self raising flour uses sodium bicarbonate, monocalcium phosphate and sodium acid pyrophospate for example, and Tesco's self-raising flour uses calcium phosphate and sodium bicarbonate.

If you look at the label of the baking powder you'll use to create your self raising flour you'll see a similar mix of ingredients - an acid such as calcium acid phosphate, an alkaline base usually sodium bicarbonate (baking soda), and you'll also see a filler such as corn starch to keep the mixture from getting moist and to make it easier to measure out. Which, incidentally, is the difference between baking powder and baking soda - baking powder often contains baking soda as the alkaline base to react with the dry acidic component, where baking soda is just the dry alkali. Many American recipes for things like muffins use baking soda only because the other ingredients such as yoghurt or buttermilk provide the acid for the reaction.

All commercially available baking powders are double-acting, meaning that you get some of the carbon dioxide gas produced when the baking powder gets wet during mixing, and the remainder is released when a specific temperature is reached during baking. The amount of gas released at each stage varies depending on the leavening chemicals used, with aluminium-based leaveners seeming to reserve most of the gas production for the temperature-induced phase.

Some people prefer to avoid the use of aluminium-based baking powders such as Clabber Girl, Calumet and the Japanese brand 'Home Made Cake' due to the stronger taste or health concerns, and opt for an aluminium-free baking powder such as Rumford or Aikoku. Although Rumford is a double-acting powder, the only acid used is monocalcium phosphate (calcium acid phosphate) which releases 2/3 of the carbon dioxide within 2 minutes of coming into contact with water - so best not to let your batters hand around too long!

While we're at it, here is some fun chemistry Japanese to help you figure out what your baking powder is made of (I should note here that though this information is correct in my understanding, I'm not a chemist):
  • 炭酸水素ナトリウム / たんさんすいそナトリウム: sodium hydrogen carbonate (baking soda)
  • 重炭酸ナトリウム / じゅうたんさんナトリウム: sodium bicarbonate (also baking soda)
  • 重曹 / じゅうそう: also baking soda (abbreviated for of above)
  • 第一リン酸カルシウム / だいいちりんさんカルシウム: monocalcium phosphate
  • 酒石酸水素カリウム / しゅせきさんすいそカリウム: potassium bitartrate, also called potassium hydrogen tartrate (cream of tartar)
  • (焼き)ミョウバン / やきミョウバン: potassium aluminium sulfate (burnt alum, potash)
  • 硫酸カリウムアルミニウム / りゅうさんカリウムアルミニウム: also potassium aluminium sulfate
  • 硫酸ナトリウムアルミニウム / りゅうさんナトリウムアルミニウム: sodium aluminium sulfate
  • ピロリン酸カルシウム / ピロリンさんカルシウム: calcium pyrophosphate
  • 酸性ピロりん酸ナトリウム /さんせいピロリンさんナトリウム: sodium acid pyrophosphate or disodium pyrophosphate
  • クエン酸 / クエンさん: citric acid
  • フマル酸 / フマルさん: fumaric acid
  • グルコノデルタラクトン: glucono delta-lactone
If you read Japanese, there is also an excellent investigation into a whole set of aluminium-free baking powders commonly available in Japan and their chemical components here.

Thanks to Nick-chan for sparking the idea for this post!

Wednesday, March 20, 2013

Make your own 'mixed spice' for British baking

Many British winter baking recipes (Yorkshire parkin, mince pies, Christmas cake, bread and butter pudding..), and a few spring ones (Welsh cakes, some hot cross bun recipes..) call for a mysteriously imprecise ingredient named 'mixed spice'. This is a particularly British mix, which is different to 'allspice' and different again to '5 spice'. How confusing. It has a warm, exotic fragrance, redolent of Christmas and mulled wine. It seems that no Japanese supermarkets sell the particular British blend. Why would they?

Cinnamon, coriander, allspice, ginger, nutmeg and cloves.

What is a Brit away from home, hankering for sticky toffee pudding recipe that calls for mixed spice to do? Well, you could do worse than buying a jar of American pumpkin pie spice, more readily available in Japan - the 4 ingredients found in most pumpkin pie spice blends are also the base of the British mixed spice - cinnamon, ginger, nutmeg and cloves.

Or you can make your own! This also has the benefit of you being able to alter the amounts of the spices in the mix to suit your personal preferences, and will make your dishes a bit more uniquely yours.

For about 4 teaspoons worth of mixed spice, enough for just a couple of bakes:
  • 1 tsp cinnamon powder
  • 1 tsp ground coriander
  • About 3/4 tsp ground nutmeg
  • 1/2 tsp ginger powder
  • 1/2 tsp allspice powder
  • 1/4 tsp ground cloves
You could also add some ground caraway seeds, a little powdered mace, a ground cardamon pod, ground fenugreek, maybe a little white pepper. Cloves and mace are quite strong and can dominate the mix if you use too much, if you're increasing the amount of either of these go slowly and add a bit at a time.

Mixed spice mountains

Make as much or as little as you like using a baker's percentage-like calculation where instead of flour, the cinnamon is used as the 100% base to calculate the amounts of the other ingredients:
  • 100% cinnamon powder
  • 100% ground coriander
  • 80% ground nutmeg
  • 50% ginger powder
  • 50% allspice powder
  • 25% ground cloves

Which, for about 40g of mixed spice (8-16 bakes) would be:
  • 10g cinnamon powder
  • 10g ground coriander
  • 8g ground nutmeg
  • 5g ginger powder
  • 5g allspice powder
  • 2.5g ground cloves

The resulting mix might be a little milder than the version you can buy ready-mixed at supermarkets in the UK, so see how it goes in your baking and use a little more than your recipes suggest if you find it is too delicate.

Ground spices don't keep potent for very long either - make sure your newly mixed spice is kept in a cool dark place and stored in an air-tight container like a clean old jam jar. Store for about 6 months and make a new batch after that.

That's clove powder masquerading as a jar olives on the left

If you want to buy your spices in bulk for less than they'd cost you at an international supermarket, try Spice Home behind Roppongi Hills, near Cafe 8, there is also Jasmine mini market near the tennis courts in Moto Azabu, or make a trip to Hyakunincho, just outside Shin Okubo station, which is becoming a veritable Little India of spice shops.

The next level of dedication to British baking might have you grating whole nutmeg nuts and grinding your own coriander seeds etc. For now though, this should be a quick enough fix to solve your hot cross bun craving.

Monday, March 18, 2013

Traditional English hot cross buns (+ cross experiments)

March already and Tokyo weather is behaving a bit more like spring. It's just the right time of year to make hot cross buns. Hot cross buns are a traditional English enriched, spiced, yeast-based bun usually containing currants and eaten during Easter, particularly on Good Friday. When I was growing up in the UK, they would appear in the shops from around about the end of February until the end of March, though I believe you can get now them from supermarkets at any time of year. They are similar to Chelsea buns in ingredients, or to British teacakes (of the split and toasted, spread with butter variety rather than these), which you can certainly get year-round, the difference being that the seasonal 'hot cross bun' is marked with a cross.

"One-a-penny, two-a-penny, hot cross buns!"

I knew the nursery rhyme (erm, you might not want to click that link..), but I guess I had never really given much thought before to the cross. When I started looking into the history of hot cross buns I was delighted to find a whole raft of superstition and folksy provenance dating back possibly to before the association was made with the Friday crucifixion of the Christian Easter holidays, starting perhaps with small cakes eaten during the Spring festivals of ancient Greece.

These are *magic* buns, hurrah! Share them with a friend and for that year "Half for you and half for me, Between us two shall goodwill be" They were banned, outside of specific religious holidays in 1592, and they were kept, stale, to be grated and used as medicine of dubious efficacy, and they were nailed or hooked up in the kitchen to ensure successful bakes throughout the year (that's one I'm going to have to try ;) ). What unexpected fun!


When I made pan di ramerino around this time last year I was wondering if it might be an Italian sister of the hot cross bun, due to the seasonality and the marking with a cross(es). As in Italy today, historically the spiced buns eaten around Easter in the UK used to be marked with a cross simply by slashing the loaves in this way. At some point this was replaced by a pastry cross pressed onto the dough, and now it's usually a white cross made with plain flour and water paste. Recipes tell you variously to slash a cross and then pipe the paste, just pipe the paste onto proofed balls, or to prepare a slightly thicker paste that you can roll thinly and cut in to strips to make the cross.


Ever the experimenter I tried all three, and personally prefer the look of the simply piped line of paste, with no slashing. (In the pics below, the first is the piped cross, the second image the slashed and piped, and the third is the neat strips of rolled dough, affixed with water.)

The winner - I preferred the piped crosses


Since my recent yeast-related baking activities have all been with wild yeast in the form of sourdough, these little fruit-studded buns seemed so fast and simple to make by comparison. With no feeding of a starter the day before or overnight proofings of imprecise duration, it's more or less a case of getting your baker's yeast ready in the usual way, putting all the dry ingredients in a bowl, dumping the yeast and liquids in and kneading for 5 mins.


The cross is just a paste of flour and water which you pipe on once the balls are almost ready to bake, Bob's your uncle! (There is no reason why these can't also be made using sourdough instead of baker's yeast, they might be a little crustier but you could experiment with adding more milk or butter to keep them soft.. Aha, future project.)

Here is the full recipe I used for mine, adapted from Delia's original recipe here.

Hot cross buns, ingredients:
  • 50g sugar, plus 1 level teaspoon
  • 1 level tablespoon dried yeast (about 9g)
  • 150ml warm water (ideally not too much over 40°C, over 50°C and you could start to kill off some of the yeast)
  • 450g plain flour (bread flour not required)
  • 1 level teaspoon salt (about 5g)
  • 1 rounded teaspoon mixed spice (see here for how to make your own mixed spice)
  • 75g currants or raisins
  • 50g cut mixed peel (Nissin supermarket has both lemon and orange, or make your own)
  • 40-55ml milk
  • 1 egg, beaten
  • 50g butter, melted
For the cross:
  • 75g plain flour
  • About 5 tablespoons of water
To glaze: (optional)
  • Either 2 tablespoons of sugar and a splash of hot water or a couple of tablespoons of warmed apricot jam

Method:
  1. Stir the teaspoon of sugar into the warm water, sprinkle the yeast in and leave for a few minutes to develop froth.
  2. Melt the butter and cool slightly, beat the egg with 40ml of the milk.
  3. Weigh the flour, sugar, salt, currants, mixed peel into a large bowl.
  4. Tip the yeasty water, eggy milk and melted butter into the dry ingredients and mix together. You want a kneadable consistency and so add any of the remaining milk if necessary (I didn't need it). Tip onto a lightly floured (if necessary) surface and knead until elastic and springy (about 5 minutes).
  5. Return dough to the bowl and cover with cling film. Leave for about an hour until roughly doubled in size.
  6. Tip the risen dough out and knead briefly to knock the air out of it and redestribute the nutrients for the yeast to continue their work.
  7. Divide the dough into 12 - each ball weighed about 78g for me, and form into little round rolls by cupping them one by one against the work surface and moving your hand in a circular motion (video) which should quickly pull the skin of the dough into the center underneath the ball.
  8. Set these on trays or baking parchment and cover with floured or oiled clingfilm to rise again - about 30 minutes. Pre-heat the oven to 190°C.
  9. Mix 75g of plain flour with about 5 tablespoons of water to make a thick paste and load it into a small piping bag. When the rolls are proofed, snip the tip of the piping bag and draw the paste across the buns to form the crosses. You could do this one at a time, or having lined your buns up neatly pipe the lines a while row at a time. Be careful of pushing too hard on 100-yen shop piping bags, this is a thick paste and can strain the bag at the seams.. go nice and slow.
  10. Bake for about 25 minutes, draping foil over them part way through cooking if they start to brown too quickly.
  11. When they come out of the oven, if you want them to be shiny you can brush them with sugar syrup made with a splash of hot water and 2 tablespoons of sugar (as in these photos), or if you want them shinier and sticky then brush them instead with warmed apricot jam.


The taste of the candied peel is lovely in these, I imagine that fresh zest would also be quite nice. The flavour is a bit like a lighter and moister version of a stollen, without marzipan.

They are best on the day they are made, but I'm still eating mine 2 days later toasted with butter. If you make more than you can eat or give away then they freeze quite well too if done on the day they are made - wrap in cling-film and foil. Leave to thaw at room temperature for about an hour.


Thursday, March 14, 2013

Set-up costs for small one-man café in Tokyo

In a previous post I detailed the set-up costs involved for 3 small-medium sized cafes, that were listed in Japanese café industry magazine Café Sweets (they sell this magazine at Tsutaya by the way, I got mine from the Roppongi Hills branch.) A recent edition of the magazine had a few more of these examples, and I was particularly interested to read how a few people are managing finances and schedules to run food businesses alone – as this is how I’m imagining I’ll be starting my business.


Here are the details:
  • 10-seater cafe and sweet shop in Osaka. Single owner/staff, open 10am-8pm. Took 4,000,000 JPY in start-up costs (about $49,000/£32,000). 1-milion of which was to secure the property, 2-mil was used for kitchen equipment, 50,000 each for refurbishment and equipment. Estimated monthly sales goal of 600,000 JPY ($7,400/£4,700), with current sales between 250,000-500,000 JPY ($3,000/£1,900 - $6,000/£3,900) per month.
  • 14-seater cafe, Kita Kyushu. Single owner/staff, open 11:30am-5/7pm. 2,500,000 JPY in start-up costs (about $31,000/£20,000). Of which 400,000 JPY was to secure the property, 1.9-mil was used for refurbishment and 200,000 JPY spent on equipment. Estimated monthly sales goal of 380,000 JPY ($4,700/£3,000), with current estimated sales at 230,000 JPY ($2,800/£1,800).
  • 10-seater cafe, Osaka. Single owner/staff, open 11:30am-7pm. 2,500,000 JPY in start-up costs (about $31,000/£20,000). Of which 1-mil JPY was to secure the property, 1-mil was used for refurbishment and 500,000 JPY spent on equipment. Monthly sales goal of 500,000 JPY ($6,000/£4,000), with current estimated sales at 300,000 JPY ($3,700/£2,400).
  • 22-seater cafe, Tokyo. 2 staff, open 11:00am-7pm. 3,500,000 JPY in start-up costs (about $43,000/£28,000). Of which 700,000 JPY was to secure the property, 1.3-mil was used for refurbishment and 1.5 spent on equipment. Monthly sales goal of 800,000 JPY ($9,800/£6,300), with current estimated sales at 750,000 JPY ($9,200/£6,000).

It was interesting to see examples of smaller scale business models, the previous article covered start-up costs that ranged from 8-15 million, which is quite a lot more than I'm looking to use! I note that 3 out of the 4 examples are not in Tokyo, and so rent might be cheaper for them and this would have a dramatic impact on the start-up calculation, since deposits and real estate agent fees and so on are usually in multiples of the monthly rent.

Something else that was interesting about this feature was looking at what part of the setting up took most of the funds for these people - the Kita Kyushu cafe used 1.9-million yen on refurbishment, where the Osaka cafe/sweet shop got by spending just 500,000 JPY on doing up the space. This sweet shop instead invested the bulk of the start-up money in kitchen equipment. It goes to show that there is certainly more than one way to do it! (I'm sure there is a coding/baking joke I can make here with bicarbonate of soda.. nope, it's not coming to me.)

Thinking about running a business alone to start with has given me a lot to consider to feel I'm as informed as I can be before taking the plunge. Aside from needing to work on all parts of the business yourself, quite a commitment is required to be able to deliver a consistent and reliable service. When you are employed by a company you are often working with a team who can cover when you are away, occasional sick-days don't feel as though they will impact your company's finances, and arrangements can be made for things like maternity and paternity leave. What does the sole-proprietor of a café do when their child is off school with a fever, when they want to take a holiday or when they have a fever themselves - in the food industry you're obliged to take time off for certain illnesses and to not handle food for a further incubation period after you recover as hygiene best practice to avoid occurrences like this one at Noma.

If you plan to run your business alone indefinitely then I guess your business model will need to be robust enough to allow for times when illness and unforeseen circumstances leading to a lack of income at some point can be managed overall, and your communications to your clients or customers will need to effectively explain and reassure them of your ability to deliver in order to retain them. I imagine that in order to make that lifestyle sustainable for yourself you also need to plan time in your schedule away from the business.

The article about the Osaka cafe/sweet shop in the example above described how the lady opened the business precisely because she felt that would be an occupation that would fit with her life with a young family. Similarly, at least 3 small business owners I know actually close their businesses for a couple of weeks at a time in the year in order to vacation or do further training/business development etc.

Though I plan to start up alone, I do envisage a time where I will hopefully be lucky enough to work with a small team. But even when it's just you or a very small team to start with, it's worth considering designing your company and all the roles within it as if it were already the ideal size, in order to be able to scale to that size and to have a workable model for when you arrive - I read about this in the well known start-up book The E-Myth Revisited.

The premise of the book is that most people who start small businesses are usually enthusiastic technicians or producers rather than business managers, and that their businesses often fail because they end up concentrating too much on the product or service (the thing they love doing) rather than working on the business as a whole.

The idea of the exercise is that while you're alone you do as many of those jobs as is practical and necessary for that stage of your business - the book even suggests you write out the job descriptions for all those roles and sign them yourself - so it forces you to be aware of their necessity and to plan time in your week to do them, and then as you expand you employ team members to take on those roles - the web designer, customer service staff, production staff, marketing team, etc. as appropriate. 

Thursday, February 21, 2013

Super umami kombu sourdough recipe

I like to think I'm quite a level-headed person. Though I love matcha I'm not the kind of baker to put the green tea powder in my custard just because it sounds cool, and I doubt I'll be reinventing the humble crumpet as a fusion faddish product with flecks of yuzu zest in the batter (though who knows perhaps these are both quite good!). However I have to confess that I have been experimenting with seaweed in bread.

Two types of kombu sourdough

There was method to the madness as you'll know if you've seen any of my sourdough journey posts - I read that part of the complex flavour of sourdough comes from the presence of the umami maker L-glutamate, and I wondered if it might be further enhanced with the addition of one the foodstuffs with some of the highest concentrations of umami, kombu seaweed.

Kombu is often present in Japanese food as a flavour enhancing ingredient. It's extolled as being essential to the most refined and elegant of traditional Japanese cooking, but when you start checking labels you see it in almost everything!


Have a look next time you're in a combini - soups, cheap snacks... In the image above you can see こんぶエキスパウダー / kombu extract powder in the ingredients of a standard bag of plain ready-salted crisps. In the UK this would probably be marketed as something like artisanal 'hand-cooked kettle chips with umami essence' but here it seems to be run-of-the-mill.

I tested two types of kombu in the doughs - shio kombu 塩昆布 / salted kombu and ma kombu 真昆布 / 'true' konbu which is a particularly high quality type of kombu from Hokkaido. Since I wanted to use the pieces of seaweed in the dough itself I bought pre-shredded 刻み / kizami type of ma kombu.

Left: ma-kombu, right: shio kombu

If you wanted to have just the umami flavour without the feature of bits of seaweed visible in the crumb, you could make a dashi (stock) from kombu and use that in place of water in your recipe. There are a couple of simple ways to do this listed here or if you want to get very serious about it have look at this technical post.

Tiny bit of seaweed peeking through the crust

I used 5g of each kombu in the half-sized loaves in these pictures, so that'll be 10g in a full sized 680g loaf.


Kombu sourdough recipe:
  • 240g starter
  • 240g water
  • 10g shredded kombu (such as shio-kombu or kizami ma kombu)
  • 7g salt (about 1.5 teaspoons) however if using shio-kombu reduce this to about 3g of salt.
  • 470g bread flour
  • splash of olive oil to stop it sticking to the bowl in bulk fermentation.
Method:
  1. Add the kombu and salt to your water and stir, pour water mixture into a large bowl along with your starter. Stir in the flour a handful at a time until it is too stiff to mix well with a spoon. You'll have added half to two thirds of the flour.
  2. Cover bowl loosely with cling film and let it rest for 15 minutes, this will start to develop the gluten and make kneading easier.
  3. Tip the dough onto a floured surface, scraping the bowl cleanish, and knead in the rest of the flour. The texture of the dough will become satiny and springy during this time, you might not need all the flour. 
  4. Splosh a little oil into the bowl you just used and return the ball of dough to the bowl.
  5. Cover with cling film and leave to rise overnight. In my roughly 21°C kitchen this takes about 8 hours.
  6. Tip out the dough, stretch it out slightly and fold in the sides as if you were folding a blanket to make a tidy square and let it relax for 15 minutes.
  7. Shape the dough into your preferred shape and leave for the final proof either free-standing seam side down or seam side up in a floured banneton. Leave until risen by about half the size.
  8. Preheat your oven with baking sheet or stone to 250°C or as high as it will go.
  9. Dust with flour lightly if you like the effect and slash the skin of the dough before misting with water and baking in a hot oven until red-brown, feels light for its size and has an internal temperature of over 90°C. In my oven this takes about 40 minutes. 


Another option illustrated in the first picture above is to introduce the kombu strands to the dough after the main kneading has taken place. In this case soak them briefly to make them pliable, stretch out the dough and knead it for a minute or so to distribute the strands through the dough.

Slashed and ready to bake

Crumb - top:shio kombu, bottom: ma kombu

You can see that the shio kombu loaf had an ever so slightly darker crumb, probably due to that type of kombu being prepared with soy sauce. The appearance and flavour of the ma kombu bread was more delicate and I think I could have used more than the amount in this recipe without it being overpowering. Due to the soy sauce component of the shio kombu however I'd recommend keeping within the 10g for a full sized loaf to avoid making a soy sauce flavour sourdough :)

In the images below, the first is the ma kombu loaf, and the second is the shio kombu loaf.


We tested the breads on their own, with oil for dipping, and then chose our favourite ones to spread with a homemade mackerel pate. SO good! And cheap - this was made from simple tinned mackerel in brine, cream cheese, dill, lemon and grated radish, mash up with a fork and adjust amounts to taste. Melt some butter and pour it over the top of the pate before chilling to set. Where's the picnic! Mackerel is called saba 鯖 / サバ in Japanese, in case you'd like to make some yourself.

Spot the 4 umami things here?

Wednesday, February 20, 2013

Japanese flour tests – Kitanokaori blend, Hokkaido bread flour

After my lovely experience in the UK trying out bread flour from Shipton Mill that was made with British-grown wheat I was excited to get back to Tokyo and try out some domestic Japanese flours.

Poppy seed sourdough made with Japanese flour

According to this grain industry article, almost 90% of Japan's wheat is imported. Most of the flour sold by Japanese brands in supermarkets here is milled from wheat imported via The Ministry of Agriculture, Forestry and Fisheries (MAFF) mainly from the U.S., Canada and Australia. 41% of the wheat imported is used for making bread and 32% used for noodles.

Most of the wheat grown domestically is from Hokkaido. You know, I've still not made it to Hokkaido after all my time here! When I first arrived in Japan I remember Hokkaido being likened to England, with lots of green grass (Tokyo grass is often more straw-like, sparse and stubbly), rolling hills and cows in fields... I think a trip is in order sometime soon, perhaps I can also find interesting suppliers for butter and so on.

I did a little research into a few of the domestically-grown varieties of wheat and picked a few blends of domestic bread flour to try out. Here is a comparison of the protein and ash content of these flours along with the Shipton Mill white bread flour and the Nissin strong bread flour I've used mainly to-date.


The domestic Japanese flours all have delightful names. My first test was with a kitanokaori blend (which I guess would translate as something like 'fragrance of the North', pertaining to it coming from Hokkaido). The Kitanokaori species was produced by cross-breeding Japanese Horoshiri and Hungarian GK Szemes wheat varieties.

The particular kitanokaori flour I bought is blended with 2 other types of domestically grown wheat (haruyokoi and kitahonami). It has a protein (蛋白質/ tampaku shitsu) content of 11.7% and ash (灰分 / kaibun) content of 0.53% - point B on the graph above. 
You can buy kitanokaori on Amazon JP, as well a number of online stores.


The Verdict -

In working with the flour to make a basic plain sourdough loaf, there was no immediate sensation of “wow this is different!” as I experienced when working with the Shipton Mill flour. Perhaps it was a little stickier/innately damper than the regular supermarket (Canadian/American) flour I’d worked with previously. During kneading it behaved less elastic despite having a similar protein content to other flours I've tried.


During proofing it rose a bit less than I'm used to, but once shaped and baked it had risen comparably well and produced a nice red crust. The crumb was a little greyish which was interesting, perhaps due to the slightly higher mineral component indicated by the higher ash content (Nisshin's bread flour has a 0.37% ash content).


There was however something unusual about the taste - while the crust tasted nutty and lovely, the crumb was slightly 'dusty' tasting. My partner described it as soapy. It was less noticeable with the poppy seed bread than with plain sourdough loaves, as the flavour of the seeds was the dominant note.


I had also made kombu bread with the same starter and my regular flour that day and it didn't have the unusual taste and so think it must be a flavour unique to this flour, an acquired taste perhaps. I still have some flour left, and so I'll try again a few weeks down the line once I've had the chance to sample a few more domestic blends. The investigation continues..!

Thursday, January 31, 2013

Steam vs. bake - The sticky toffee pudding trials

Sticky toffee pudding, known in some countries as sticky date pudding, is another classic British comfort food like jam roly-poly that reminds me of school dinners (which is what we call school lunch in the North of England). It’s traditionally steamed in a pudding bowl, but is more like a cake than a pudding. Certainly it is more like a cake than Japanese プリン / pudding. Made with the dried fruit, nuts and wintery spices like cloves, served hot with a warm caramel toffee sauce poured over - it might look a bit inelegant but it’s shockingly good.


It isn't unusual for people to huddle possessively over their bowl until it’s finished. It was just such a reaction from a friend I had eventually made the pudding for that produced one of the first inklings that I might have a chance at making my little business idea work - She was so profoundly happy to taste it again after years living in Japan.

Though the pudding was traditionally steamed, most recipes you find today are for baking it. I was curious to see if there would be much difference to the end result between steaming and baking the sticky toffee pudding, and to see which would be better. If the steaming is good, I also thought to myself, then it means this is one traditional British dessert that can even be made in those Japanese kitchens that don't have an oven!

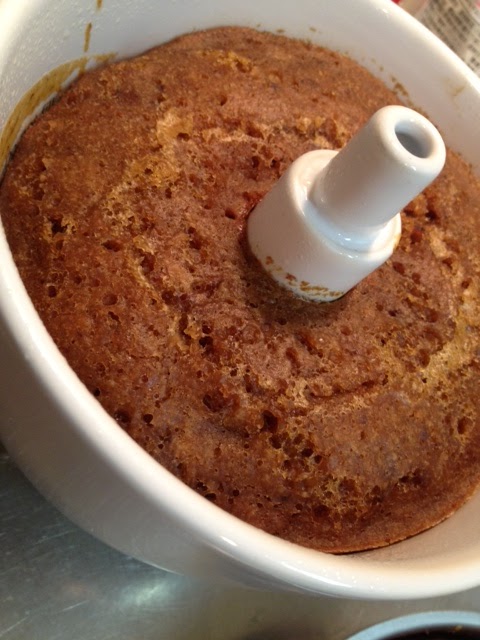
Sticky toffee pudding steamed in a pudding basin

The same sticky toffee pudding recipe baked in the oven

I used exactly the same recipe for each pudding, adapted from Felicity Cloake's in-depth investigations into some of the most well known versions.

This amount in the recipe made enough to divide between my 600ml pudding basin and a 14cm heart-shaped cake tin.
If you're only going to be baking then Felicity suggests a 24cm x 24cm square baking dish.
If you're only steaming then either do 2 smallish puddings in 500ml capacity basins or use one large 1-1.5 litre basin and adjust steaming times accordingly. If you don't have a pudding bowl any good solid, deep and heatproof bowl with a rim around the top to help keep the string in place will do.

Ingredients for the sponge:
  • 175g dates, stoned and barely chopped (I like chunks of date in the pudding)
  • 1 tsp bicarbonate of soda
  • 200ml boiling water
  • 100ml brandy (or just use 300ml boiling water/weak tea)
  • 50g unsalted butter, softened
  • 80g light brown sugar
  • 80g dark brown sugar
  • 2 eggs, beaten
  • 1/2 tsp vanilla essence
  • 175g plain flour
  • 1 tsp baking powder
  • 1/2 tsp ground cloves
  • 1/2 tsp cinnamon
  • 75g walnuts
  • Pinch of salt
Ingredients for the sauce:
  • 115g unsalted butter
  • 75g caster sugar
  • 40g dark brown sugar
  • 140ml double cream
  • Pinch of salt

Method (if baking):
  1. Pre-heat the oven to 180°C and roast the walnuts for 5-10 minutes. Butter your baking dish.
  2. Make the sauce by putting all the ingredients into a pan with a pinch of salt and heating slowly until the butter has melted, then turn up the heat and bring to the boil. Boil for about 4 minutes, until the sauce has thickened enough to coat the back of a spoon. Pour up to half the sauce into the base of the dish and then put it in the freezer while you make the batter.
  3. Put the dates and bicarbonate of soda in a heatproof dish, pour over the boiling water and add the brandy if using. Leave to soften while you make the batter.
  4. Beat together the butter, sugar and salt with a hand mixer until fluffy. Add vanilla essence to the eggs and beat them into the mixture a little at a time. In other bowl sift together the flour, baking powder and spices and then fold these into the mixture until just combined. Add the dates with their soaking liquid and the walnuts, and mix well. The batter will be a little looser than regular cake batter.
  5. Take the dish out of the freezer and pour the batter on top of the toffee sauce. Bake for 30 minutes, until a skewer inserted into the cake part comes out clean (though remember you might get some of the sauce on the end of the skewer).
  6. When the pudding is ready turn it out onto a dish to serve. Serve with a jug of warmed sauce for pouring, or poke a few holes in the sponge and pour over the rest of the sauce. Serve in bowls as it is, or with ice cream or custard. Alternatively you can let it cool down and reheat it and the sauce in the microwave if you're not serving it immediately.


Method (if steaming):
  1. Prepare a large pan of water for steaming and a buttered pudding basin. If your basin doesn't have its own lid watch this video to see how to make one from foil and buttered parchment.
  2. Roast the walnuts for 5-10 minutes in an 180°C oven - optional, turning the oven on just for this part feels a bit wasteful, but gently roasted nuts do add a nicer flavour than raw nuts.
  3. Put the dates and bicarbonate of soda in a heatproof dish, pour over the boiling water and add the brandy if using. Leave to soften while you make the batter.
  4. Beat together the butter, sugar and salt with a hand mixer until fluffy. Add vanilla essence to the eggs and beat them into the mixture a little at a time. In other bowl sift together the flour, baking powder and spices and then fold these into the mixture until just combined. Add the dates with their soaking liquid and the walnuts, and mix well. The batter will be a little looser than regular cake batter.
  5. Pour the batter into your buttered basin up to about halfway (or as your basin indicates), to give the pudding room to rise. Seal the basin with its lid, or prepared pleated foil and parchment (as described in the video above). Tie the string to make a handle for removing the hot basin later and lower into the pan of simmering water, onto something like an upturned saucer - see photo above. Make sure there is 1cm or so clear between the inside of the pan and the basin and that the hot water comes up to about halfway up the outside of the basin (or as your basin indicates). Cover the pan with a lid, or foil and steam until a skewer inserted comes out clean.
  6. My pudding basin is medium sized at 600ml and it has a hole through the middle like a bundt cake, to help steam quickly and so my pudding was ready in about 45 minutes. If you are using a traditional pudding basin without a hole and/or if you are making a larger pudding then steaming may take 1-2 hours. You might also need to top up the boiling water during the steaming time, keep an eye on it to make sure the water stays high enough to cook the pudding and that you don't boil dry.
  7. Make the sauce by putting all the ingredients into a pan with a pinch of salt and heating slowly until the butter has melted, then turn up the heat and bring to the boil. Boil for about 4 minutes, until the sauce has thickened enough to coat the back of a spoon.
  8. When the pudding is ready turn it out onto a dish to serve. Poke a few holes in the sponge and pour over the sauce. Serve in bowls as it is, or with ice cream or custard. Alternatively you can let it cool down and reheat it and the sauce in the microwave if you're not serving it immediately.


The verdict - (Steamed pudding in the first photo, baked one in the second)

The steamed pudding won. It won so majorly that I barely had time to take this photo of the last piece in the bowl at the party I took it to :) Hurrah! Although the baked version was quicker and also delicious, the steamed pudding was fluffier and remarkably moist. The oven-baked pudding was more intensely sweet all-over perhaps because of the sauce baked into the base, whereas the steamed pudding had more variety in tastes and texture. The baked pudding had a closer crumb, where the steamed pudding was open and springy.

Perhaps next time I'll try putting some sauce in the base of the steamed pudding basin - I was afraid I wouldn't be able to get it out of the steaming mould... I've also seen interesting things along the lines of tarte-tatin with caramelised apples or pears in the base of the pudding. More comfort food experiments ahead to keep us warm in the Tokyo winter months!