Showing posts with label Recipes. Show all posts

Monday, November 25, 2013

This year's mincemeat - getting ready for Christmas

Just a quick post to remind any ambitious parties who are planning to embark upon making their own Christmas puddings, mincemeat or Christmas cake, stir-up-Sunday was just this weekend and it is perfect timing to get stuck-in and make your house smell like Christmas.


I wonder how much mincemeat I’ll be making this time next year? I’m so excited about getting started with the business I can barely concentrate on all the (still many, many) tasks at hand in order to start... This year I made a modest amount just for gifts, samples, and I’m reserving a special 400g of it to take back to my family in the UK in a couple of weeks time, to bake mince pies “for Father Christmas” with my niece and nephews.

I made this particular mincemeat with butter instead of the traditional suet, as suet suitable for baking is hard to come by in Japan and I wanted to see if I minded the non-traditional version. I’m pleased to report that I don’t mind at all! It is really lovely. Of course it also means that my vegetarian friends can enjoy the mincepies too.


Here is the recipe I used, adapted from Delia Smith and Mary Berry's recipes.

Ingredients:
  • 225g Bramley apples cored and chopped
  • 175g raisins
  • 110g sultanas
  • 110g currants
  • 25 chopped almonds
  • 110g butter
  • zest and juice 1 lemon
  • zest and juice 1 orange
  • 175g brown sugar
  • 60g dried apricots, chopped
  • 50g candied lemon peel
  • 60g candied orange peel
  • 1 teaspoon mixed spice
  • 1/2 teaspoon cinnamon
  • pinch of salt
  • 4 tablespoons of brandy (or preferred amount to taste)

Method:
  1. Combine all ingredients in a large pan and heat gently to melt the butter and sugar. Continue to heat through very gently for 10 minutes, stiring occasionally and leave to cool.
  2. Once cool, add your preferred amount of brandy and decant into sterilised jars. 
  3. Store the mincemeat in a cool dark place while the flavours develop further until you need it at Christmas.
Note that if you are using glass jars with metal lids, it's best to put a piece of plastic wrap between the lid and the jar to avoid any reaction between the lid and the acidic contents of the jar. 

The best thing about making your own mincemeat is that you can adapt the mix of dried fruit to your own tastes – just keep the total weight of dried fruit roughly the same as your recipe. Many recent recipes add cranberries, I like to add dried apricots, as I think they go fantastically with the almonds and brandy.

If you've also made your own British mixed spice and customised your blend of spices to your preference, then you’ll have a totally unique mincemeat of your own!

Wednesday, August 7, 2013

Classic Victoria sponge cake, recipe and comparison of 3 mixing methods

Today a classic British dessert – Victoria sponge cake. Not a dainty number at all, this is a properly rich and hearty, good honest cake and is very easy to make with the right recipe and ingredients you can find in any Japanese supermarket. In America this would probably be called a butter cake.


The cake is connected with the origins of British afternoon teas - Queen Victoria developed a taste for continental-style afternoon refreshments thanks to the fancies of one of her ladies-in-waiting, and this is said to have become one of the Queen's favourite cakes. The 7th Duchess of Bedford had taken to having tea and small snacks in her rooms, to banish "that sinking feeling" during the late afternoon, and this developed into an intimate social event with friends inviting each other for "tea and a walking the fields". Sigh. Ever get the feeling you were born in the wrong century?

The basic recipe is elegant – you use the same weight of butter, flour, and sugar as the eggs, weighed in their shells. Then there is just the issue of baking powder, whether to add vanilla flavouring, and whether you'll be traditional and spread it with raspberry jam only, be lavish and go with a layer of whipped cream or buttercream on top of the jam, or do something interesting with fresh fruit, lemon curd and other crazy things. :)

The traditional adornment is just sprinkled caster sugar

A word or two about baking powder.

Most recipes call for self-raising flour, which is just plain flour with baking powder and salt already added. Then, depending on the recipe, additional baking powder is sometimes added. I compared a few well-known recipes to see the estimated total amount of baking powder per gram of flour and you can see there is quite a range. (Calculations based on assumption that self-raising flour has 5g of baking powder in every 100g, and that a teaspoon of baking powder is 4g.)

Total baking powder per 100 grams of flour in each recipe:
This was a really interesting exercise. The Vanilli sponge is often remarked upon for including so much baking powder, but because there is so much more flour in her recipe it ends up being the lowest concentration of baking powder of the lot.. see, interesting!

Mary Berry's is the highest, and is probably because she uses the all-in-one method of mixing which does not cream-in any air pockets to help with the rise. I started off with the Mary Berry 9g/100g baking powder vs flour ratio for the mixing method tests below, since the Victoria sandwich is her specialty, having made hundreds when working as an oven tester, but surprisingly I found it was too much. This at least gave me the opportunity to demonstrate to you that adding too much baking powder will cause your cake to dip in the middle:

"That sinking feeling" caused by too much baking powder

6 cakes later (yep, 12 layers, baked one at a time.. I can't wait to have a bigger oven at my disposal) having the amount of baking powder sorted, I wanted to see what the difference would be in using the various mixing methods available. Keeping the recipe amounts and cooking times etc. constant I tested the traditional 'creaming method' along with the 'all-in-one method' that is frequently described as foolproof, and a newly popular 'reverse creaming method'.

Victoria sponge cake recipe:
  • 3-4 eggs at room temperature, weighed in their shells (3 large eggs came to 200g for me)
  • Same weight of butter
  • Same weight of plain flour
  • Same weight of sugar (caster sugar is best, see here for advice on sugar in Japan)
  • 12g of baking powder (or amount of flour x 0.06)
  • Couple of splashes of vanilla oil (or essence, or scrapings of half a vanilla pod)
  • Pinch of salt
  • About 4 tablespoons of jam and caster sugar to decorate
- 2 x 20 cm round cake tins preferably with removable bases, greased and lined with parchment.
- Preheat oven to 160°C (170/180°C if not a fan oven)


Method options (pics above show methods 1, 2 and 3, from left to right.)

1 Creaming method
  1. Beat softish butter (about 15-18°C) until slightly lighter in colour, add sugar and beat well until light and fluffy. Good creaming tips here.
  2. Add lightly beaten eggs and vanilla oil into the butter bit-by-bit, adding a teaspoon or so of flour if it starts to curdle. 
  3. In a separate bowl combine sifted flour with baking powder and salt and then add them to the egg mixture, folding in gently and slowly until just combined. 
  4. Split batter between 2 tins and bake on the same shelf for 25 minutes.
  5. Cool completely, place one layer upside down and spread with jam. Cover with second layer and sprinkle sugar on top.

Rev-cream may look curdled, but will be fine.

2 Reverse creaming method ("2-stage method")
  1. Combine sifted flour with baking powder, sugar and salt in stand mixer bowl with paddle attachment.
  2. Add cubes of soft butter (about 18-20°C) and beat at slow then medium speed until just a few pieces remain.
  3. Add lightly beaten eggs and vanilla oil into the mixture bit-by-bit, scraping down the sides once or twice.
  4. Split batter between 2 tins and bake on the same shelf for 25 minutes.
  5. Cool completely, place one layer upside down and spread with jam. Cover with second layer and sprinkle sugar on top.

All-in-one method. But put your flour in last.

3 All-in-one method
  1. Have your butter soft (about 18-20°C). Combine sifted flour, baking powder and salt.
  2. Dump all ingredients in a large bowl, flour mixture last to avoid patches of dry flour being trapped at the bottom.
  3. Beat on slow then medium speed to avoid a mess, until just incorporated.
  4. Split batter between 2 tins and bake on the same shelf for 25 minutes.
  5. Cool completely, place one layer upside down and spread with jam. Cover with second layer and sprinkle sugar on top.

Pulling away from sides of pan, browned, skewer comes out clean

Extra tips:
  • Whisk/stir the sifted dry ingredients together to distribute the baking powder evenly.
  • Creaming and all-in-one method are possible to make by hand or with a hand-held mixer (just use a large bowl and start off at low speed to avoid the flour going everywhere), reverse creaming is probably best with a stand mixer.
  • The batter should be easily spreadable in the tin rather than free-flowing. However, if the batter is very thick, add a little milk to loosen it.
  • It's fine to have one layer hanging about for half an hour, better to do this if your oven won't fit two tins on one shelf, so that they will bake evenly.
  • If you're using whipped cream as a filling, you want it fairly stiff to hold the weight of the top layer. Use a cream with a high fat percentage such as 45 or 48%. If you want to be particularly neat, piping the cream in a spiral on top of the jam, starting from the outside edge is a good way to get a firm even layer. It's also fun to have it dolloped on in a more rustic manner.

4 tablespoons of jam was plenty for me


Verdict on the 3 mixing methods (all sets of photos show methods 1-3, lined up from left to right)

First things first, the taste of these cakes was identical, even the initial sunken tests tasted good. :)

The all-in-one method is definitely the simplest, it is pretty fail-safe provided your butter and eggs aren't too cold. Most Victoria sponge recipes these days seem to use this method.


I noticed that an attractive frill around the top edge of the sponges (image above) tends to develop more when using the all-in-one method than others, not sure why this is the case but I quite like it. I found this cake had an ever so slightly coarser crumb, although it had a nicely domed top like the creaming method cake.


The creaming method has the potential to deliver the highest cake of the lot, since you're whipping air into the butter with the sugar at the beginning and this adds to the lift brought about by the leavening agent. Certainly the center of the creaming method cake was the highest of the 3 in my test (6.3cm vs 4cm at the edges!).


The one that was more noticeably different, although only if you were looking for it really, was the reverse-creaming method. This cake had the finest crumb, meaning that the grains of sponge and most of the holes between them appeared smaller, more evenly distributed. The effect was a little more lacy than the others. The top of the sponge was decidedly flatter too (5 cm in the center, 4.5 cm at the edge), a useful feature if you are planning to decorate the top with cream and fruit.


It was a smarter looking cake, though a bit less traditional than the gently sloping hillocks that were the other two. The idea behind reverse-creaming is that by coating all the flour grains in fat before liquid is present, you inhibit the development of gluten, and so the cake should be the least tough and not remotely chewy.

This method is often attributed to Rose Levy Beranbaum who popularised it in 1980's, but is cited in The Science of Good Cooking as being invented in the 1940's by General Mills and Pillsbury. The Lilly Vanilli pillow cake also uses a similar reverse-creaming method (although my test cake uses this method, it doesn't have the same high flour and sugar to butter ratio of Vanilli's recipe and so is definitely more of a Victoria sponge than a pillow cake).

So in summary, use the all-in-one method for speed and reliability, reverse-cream for fine crumb and sturdy structure for layering, and use the traditional creaming method if you want to aim for height.

I hope this was helpful or interesting. Aside from the nostalgia trip, these are just lovely cakes to make and eat, I particularly like the whiff of caramel when you're peeling the backing paper off the sponges. It would be an excellent offering at a picnic - robust enough to survive transporting to the park, and the variety without cream should hold up particularly well even on a sunny day.

And should you, horror of horrors, find yourself with Victoria sponge left-overs, you could chop it up and turn it into a rather lovely sherry trifle, especially if it's a little stale.


Sunday, June 2, 2013

Fibonacci cake, a golden ratio Battenberg. Challenge accepted!

While honing my Battenberg neatening skills recently, my partner declared that I *must* turn the Battenberg into a golden ratio cake. Indeed, a Battenberg isn't quite fiddly enough ;)


The Fibonacci sequence is where each number is the sum of the previous two numbers, that is: 0, 1, 1, 2, 3, 5, 8, 13, 21, 34, 55 and so on. Examples of the golden spiral are found in nature and can be incredibly beautiful.

To quote a particularly alliterative Melvyn Bragg from his In Our Time programme on the topic
"The Fibonacci sequence is found to appear time and time again among the structures of the natural world, and even in the products of human culture. From the parthenon to pine cones, from the petals on a sunflower to the paintings of Leonardo da Vinci, the sequence appears to be written into the world around us".

Tasty maths!

There are quite a few cakes online that depict the famous Fibonacci sequence, and it’s quite interesting to see how different people have approached it. There is also this cute Mondrian cake which looks a little like a Battenberg variation, and this pretty amazing Rubik's Battenberg but I’ve yet to find a Fibonacci Battenberg exactly. Hmm would it be a Battenacci, or a Fibonberg..?


I decided I wanted it to be recognisable first and foremost as a Battenberg, and that part of the fun would be revealing the inherent mathematical layer of beauty of the thing through the decoration. 5cm square cross-section is about as big as my cake tins could take me, and it works out nicely as a slightly diminutive slice of Battenberg, where 8cm would start to become a bit of a monster cake. With an inability to work with infinitely smaller planks of cake that the making of a true golden spiral might require, I decided to start with 1cm square units and work up from there.

All right then, are we ready?


Fibonacci Battenberg recipe - yields 2 cakes

Equipment you’ll need:
  • A cake cutter, and/or long knife
  • A clean ruler or tape measure
  • Cocktail sticks/skewers to mark the cake
  • 1 or 2 20cm square cake tins that are at least 5cm deep
  • Rolling pin
  • Pastry brush
  • Baking parchment and plastic wrap
  • About 3 hours..
  • A maths nerd to present the cakes to

Trusty equipment and colouring. I used pink gel, but a little red also works

Ingredients for the taller yellow sponge:
  • 350g very soft butter
  • 350g caster sugar
  • 330g flour
  • 20g/5tsp baking powder
  • 0.5tsp salt
  • 6 eggs
  • 0.5 tsp vanilla extract

Ingredients for the pink sponge:
  • 175g very soft butter
  • 175g caster sugar
  • 165g flour
  • 10g/2.5tsp baking powder
  • 0.25 tsp salt
  • 3 eggs
  • 0.5 tsp vanilla extract
  • 0.5 tsp almond extract
  • A little red or pink food colouring

Additional ingredients:

The yellow sponge will come right up to the top of the tin when baked

Method:
  1. Grease and line the cake tin(s) with baking parchment. Preheat the oven to 160°C.
  2. Make the yellow sponge. - Sift the yellow sponge's amount of flour, baking powder and salt into a very large bowl and mix well.
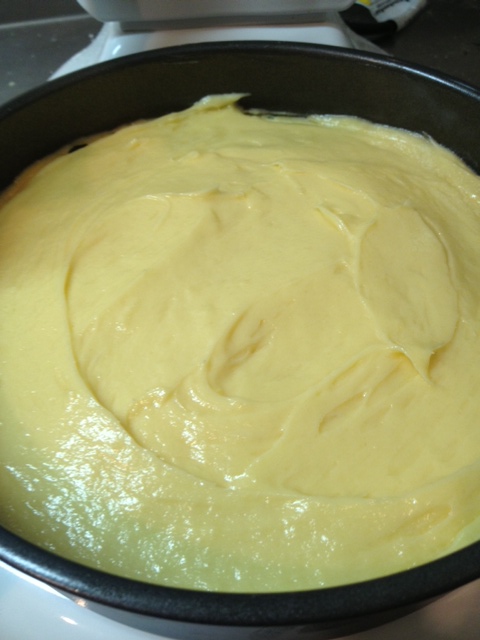
  3. Add the soft butter, sugar, vanilla essence and eggs all into the same bowl and whisk together until just combined. (If you're using a stand mixer however, it's best to sift the dry ingredients on top of the wet ingredients to avoid a layer of flour at the bottom of the mix. Mix on the lowest speed.)
  4. Scrape the mixture into a prepared tin, spreading to the corners and bake for about 1 hour, reducing temperature part way if it browns quickly.
  5. Repeat steps 2-4 for with the pink sponge ingredients and bake for 25-30 minutes. (If you're reusing the same tin, cool it down with some cold water before using it again.)
  6. While the sponges are baking, make the marzipan if you're making your own. 
  7. With the two squares of sponge out of their tins and completely cool, cut off the browned tops of the cake and any sloping edge pieces. You want your yellow cake to be 5cm high, and the pink cake to be 3cm high. (Tip – if this is tricky, then chill or partially freeze the sponge and it will be easier to cut straight lines. Also, save the cuttings to crumble up with frosting to make cake pops.)
  8. Use a toothpick to make indents at the top and bottom edge of the sponge to mark out the following long rectangular blocks and cut them carefully from the main block. 
    • From your yellow sponge: cut two 5cm-wide strips, creating planks of sponge that are 5cm square in cross-section. Also cut 2, 2cm square planks and 2, 1cm square delicate strips. When maneuvering the delicate strips, guard against breakage by rolling them sideways onto something like a long blade rather than picking them up by their ends.
    • From your pink sponge: cut 2, 3cm square planks and 2, 1cm square delicate strips. 

Being a bit punctilious helps ;)

The order I used to stack the cake (you'll be doing it with jam)

Assemble the cake:
  1. Roll out the marzipan to at least 25cm x 30cm. If it’s sticky, roll it between two sheets of plastic wrap, peeling the top layer off when you’re ready to wrap the cake. 
  2. Heat the jam and paint sides of all the sponge strips, glueing them together with the jam as you stack them into a golden ratio rectangle (see the order I used above, but use what works for you). It will be slightly less sticky if you avoid painting the outside faces of the planks until you’re ready to wrap the thing, but it’s not a terrible problem if you paint a side too early as they will all need jamming up in the end. Working on baking parchment will also make it easier to move it to the marzipan later.
  3. Position the whole sticky block of planks onto the center of the marzipan, upside down - you want the marzipan seam to end up on the bottom.
  4. Paint the top with lots of jam and fold up the sides of the marzipan up to make a join on the top. Trim any large excess and smooth over the join.

Roll out about a 25cm x 30cm sheet of marzipan

Ooh yeah! We're jammin', jammin' (Sorry ;) )

Use the plastic wrap to help if your marzipan is at all thin or sticky

  1. To finish, turn the cake the right way up and give the marzipan a final squeeze to make sure it’s all nicely stuck to the jam. With a sharp knife, cut off a thin slice from each end of the log to reveal a neat presentation of the cross-section form each end. 
  2. Decorate the marzipan if you wish, by making indentations with a fork, pinching the edges to make a ruffle and/or demarcating portion sizes on top. Sprinkle with icing sugar if you like.
  3. Present slices of your masterpiece with mathematically almost-accurate golden ratio swirls of melted chocolate, jam, whipped cream, a rope of marzipan or something else that takes your fancy. Or even better, provide the tools to let your guest create the beautiful spiral themselves.

Otsukaresama deshita :)


Battenberg recipes referenced
http://www.bbcgoodfood.com/recipes/1120657/battenberg-cake
http://www.bbc.co.uk/food/recipes/battenburg_cake_60878

--
Options:

- I chose to use an all-in-one mixing method rather than creaming the butter and sugar together first, as it should result in a flatter top and it’s quicker so will save a little time in this fiddly project.

- Another time saver would be to mix up all 9-eggs worth of batter in a large stand mixer and estimate 2 thirds of it for the yellow sponge before colouring the remainder.

- A final option would be to make just one fibonacci cake by making up just one 6-egg batch of sponge, and dividing your baking tin in two with a folded piece of parchment (see here for how) and being very careful when you’re pouring in the batter. Pour half in one side of the tin, then colour the remaining half and pour it in the other half. You'd just need one of each 'plank' size in that case. This is a bit fiddly, and since Battenberg freezes well I decided to make it a bit easier on myself and just made two.

A mathematically inelegant remainder...

Wednesday, May 22, 2013

Lip-smacking sourdough onion rings recipe, excellent use of pour-off

The other week I was browsing around old posts on one of my favourite food thoughts sites, Joe Pastry, and found an idea that was a bit of an epiphany. Sourdough onion rings! In fact, sourdough batter fried anything! (Apple fritters, anyone? Must, must try. Perhaps even Bramley apple fritters? hmm...)


If I’m not baking sourdough bread every weekend my starter gets a bit neglected and not in the best of spirits. It’s not much of a problem as it is nicely revived after a couple of feeds but I prefer keeping it fairly active and healthy, with the idea it might help it ward off mold and off-notes. The main problem is the pour-off. I hate wasting starter and worry about the effect on plumbing even if the pour-off is thoroughly diluted and chucked down the loo instead of the kitchen sink. Pancakes are well and good, as are waffles made with sourdough batter, but it’s good to have a bit more choice.


Looking around, regular onion ring recipes often include eggs in the batter. Some use them simply mixed in with flour and others have the yolks mixed in first and the whites whipped to stiff peaks before folding into the batter, yet more batters use beer.

Sourdough starter has a couple of good things going for it as use as a batter aside from the fact you may have been about to throw it out anyway – the processes of the yeast and bacteria thriving in the starter produce lactic and acetic acids and alcohol and so there is a wonderful vinegary tang already in the batter, before, as any self-respecting Brit would, the fried product is liberally doused with vinegar at the table. I would go as far as to say that depending how sour your starter is when you poured off the portion to use for this recipe, you might not even need additional vinegar at all... just sayin'.

Comparing a few sourdough onion ring recipes and attendant photos, it seems the key to having a nice thick bubble of airy batter around your ring, that adheres properly to the onion at all stages of preparation and eating, is twofold – dredge the raw rings in flour before dipping in the batter and have your oil hot enough for frying. Most recipes state the oil should be at least 175°C (340°F), and I've also seen 190°C (370°F) recommended.

Don't crowd the pan

Very excited to try this out, I sourced a little tempura pan at a local supermarket. It was about 1,800 yen (just over 10 quid), simple design with a cute rack for the temporary resting of fried goods. Of course you can use any deep fat fryer you might have, indeed the electric ones are also much safer than these old fashioned pan-of-boiling-oil setups.


Recipe for sourdough onion rings
  • About 240ml (1cup) of cold sourdough starer
  • About 60ml (quarter of a cup) of cold sparkling water
  • About 60g (half a cup) of flour
  • A large onion
  • Oil for frying (canola, etc)
  • Salt and pepper
  • Any exciting seasonings you want to add such as paprika, garlic salt, chilli flakes etc.
All measurements approximate, adjust depending on how thick and sour your starter is. You want a consistency thick enough to cling to the onion, similar to pancake batter. Starting with a cup of sourdough starter gave me enough batter for a bit more than just 1 large onion. Original recipes referenced include the Joe Pastry example and this from La Brea Bakery's Nancy Silverton.

Method:
  1. Slice your onion as thick/thin as you'd like, my slices are about 1 cm thick and I separated out the rings so they had about 2 layers each. I left the smaller center rings intact as little solid discs.
  2. Put the rings into a shallow dish of seasoned flour, turning them over to have the flour stick to the juicy bits of the sliced onion.
  3. Mix your starter with the sparkling water in a smallish bowl along with any seasoning you want to use. I've seen recommendations to rest the small bowl inside a larger bowl that contains ice water/rest a metal bowl on a frozen gel pack, or like when you make tempura you could put a couple of ice cubes directly into the batter to keep it cold. The idea is that cold batter helps to create a crispy fry. I used the 'bowl over an ice water bath' method for these rings but I think you’d also probably get quite good results by using cold ingredients fairly quickly.
  4. With your oil between 175 – 190°C (340-370°F. Use an infrared thermometer to be sure, or test the oil. The oil won’t be bubbling until the food is introduced), reduce the heat if necessary to avoid going too hot and take a slice of onion from the flour, drop it in the starter mix and turn to coat if necessary. Lower them one by one into the hot oil carefully using cooking chopsticks or tongs. 
  5. Use a metal strainer or slotted spoon to turn the rings over and fry for about 3 minutes or until they are slightly golden. Note that the temperature of the oil will drop temporarily each time you add something, so take care to do just a few at a time and keep your oil in the frying range or your rings will be greasy.
  6. Remove with the strainer or slotted spoon and transfer to kitchen paper to drain briefly. Salt to taste.


Keep finished rings warm and crispy in an oven at 100°C while you finish off the batch. Apparently you can freeze them and reheat them in the oven, but we didn't leave any to test this theory.

For people reading this who don’t currently own a sourdough starter, here is a non-sourdough onion ring recipe to try.

A couple of additional points I feel duty bound to relate. I was a tad nervous about having boiling oil in my kitchen. I made sure the work area was clear, the cats were not around me, I checked the amount of oil recommended to use for the size pan I have and used no more to avoid spillage. I also used an infrared instant read thermometer to check that the oil wasn't getting too hot. Smoke points and flash points for oils vary. The generic サラダ油 salad oil (usually a mix of canola and soybean oil) is most frequently used for deep frying here in Japan and has a flash point of 360°C (680°F). 天ぷら油 tempura oil is usually a mix of sunflower and sesame oils and is listed on this site as igniting from around 360 – 380°C (680-716°F). Both of these are somewhat far from the up to 190°C (370°F) I was aiming to maintain, but drips of oil falling onto the flames can cause fires even when the main body of oil in the pan is at a safe temperature.

So point number one: be safe, use a thermostatically controlled electric fryer if possible, and check how much oil your pan permits for safe use (usually no more than a third full). Don’t over-heat the oil causing it to smoke, and if it starts to smoke, then stop and turn off the heat before it sets alight. Never throw water on boiling oil and don’t try to move a pan that is on fire. Old advice about damp tea-towels is no longer recommended in the UK, the official recommendation of the fire service in the event of a pan on fire is to turn the heat source off if it is safe to do so, then get out and stay out and call emergency services.

Electric deep fryers are available in Japan, but many people still use the traditional type of tempura pan I used, and hence the most common cause of kitchen fires in Japan is from cooking tempura. The official line on kitchen fires from many ward offices is still to use a wet towel to extinguish a fire, and there are things such as this fire extinguishing flower that you throw into the pot, other advice recommends using a lid to try to extinguish a fire. Though I hope you'll never need it, the fire service number in Japan is 119. Some useful info here on the US embassy's site about calling emergency services in Japan.

Secondly: be a mensch, don’t pour the used oil down the drain. The oil will solidify and can block drains and sewage pipes. In Tokyo we are advised by our ward office to let the oil cool and pour it into a container such as an old milk carton that has scrunched up newspaper or fabric inside it, then tape the carton shut and put it in with your burnable rubbish. You can also get an oil coagulant which allows you to put the oil in solid chunks straight into the burnable rubbish.

You can use your oil a few times for frying, particularly if you strain it each time. But the oil will eventually become rancid with use and exposure to air. (Though apparently, the frequently retold rumour that repeated use of cooking oil produces of trans fats is untrue as long as the oil was not partially hydrogenated to start with. If you want to check the Japanese label of your oil, partially hydrogenated in Japanese is 部分水素化 bubun suisoka).

I've read on Japanese forums discussing tempura that using oil 3-4 times is a pretty good rule of thumb, but it depends on what you fry. If the oil becomes dark and starts to smell bad then it’s certainly time to throw it away.

Phew I had no idea when I started this post that it would turn into such a mammoth investigation of frying! Goodness me. Enjoy!


Thursday, March 28, 2013

Welsh cakes for hanami in Tokyo (recipe!)

This post would perhaps best have been made on March 1st to celebrate St. David’s day, the patron saint of Wales. Welsh cakes are delicious any time of year, but they come to mind when the daffodils, a symbol of Wales, are blooming in March along with the cherry blossoms.


Welsh cakes (picau ar y maen in Welsh) are a type of scone, flavoured with dried fruit and mixed spice, rolled out a little more thinly than regular scones and cooked on both sides on a traditional bakestone or a hotplate or just in a frying pan instead of being baked in the oven. When they are done they should be a reddish-brown on both sides and cooked all the way through. You sprinkle them with a little sugar while they are still warm, and it sticks to the surface in a shimmery layer.


The 'correct way' to make Welsh cakes is fiercely contested, with many families swearing by their Grandmother's particular method, adding candied peel, using baking powder and extra bicarbonate of soda, with or without eggs. See here for a highly amusing challenge to the authenticity of the wife of last year's US presidential candiate Ann Romney's Welsh cakes.


In the UK, Welsh cakes are often made with half of the fat being butter and half being lard, and they are traditionally cooked using a little lard to grease the plate. Since lard isn’t all that easy to come by in Tokyo, this recipe is for all-butter Welsh cakes. If you have access to lard you might want to try it as it will give a lighter, flakier result.

Welsh cakes. Adapted from the original Delia Smith recipe here for those of us without self-raising flour.

Ingredients
  • 220g plain all-purpose flour
  • 2 level-teaspoons of baking powder
  • 1/2 teaspoon of salt
  • 1 level-teaspoon mixed spice
  • 75g caster sugar
  • 110g butter
  • 110g raisins (or mix of raisins, currants, candied peel)
  • 1 egg
  • a little milk
  • extra butter for cooking

Method
  1. Sieve the flour, baking powder, salt and mixed spice together in a large bowl. Distribute the baking powder evenly through the flour by giving it a quick stir with a metal whisk or a fork.
  2. Add the butter in small cubes and rub it into the flour until it resembles breadcrumbs - a few bigger bits of butter here and there are fine.
  3. Stir in the caster sugar and the dried fruit.
  4. Beat the egg lightly and cut it into the mixture with a round-bladed knife.
  5. If the dough doesn't start to come together after cutting and mixing with the knife, add a small splash of milk or two and mix until it does. The dough shouldn't be too wet or sticky.
  6. Turn out of the bowl and knead very briefly until it has come together. 
  7. Press the dough ball slightly flat on a lightly floured surface and roll out until it's between 1/2 - 1cm thick. They puff up slightly when they cook.
  8. Use an upturned glass or round cookie cutter about 6cm wide to cut out discs of dough.
  9. Add a little butter to your pan and heat to medium-hot.
  10. Transfer the cakes to the pan and cook until browned but not burned on the under-side. Use a spatula to gently lift an edge of one after a minute or so to check they aren't browning too quickly. 
  11. When they are ready to turn over the tops will still be doughy but the base will be firm enough to give you purchase to slide under and flip them over. Use a knife and a spatula to make it easier to maneuver.
  12. They should take 2-3 minutes on each side and you can then transfer them to a rack to cool and sprinkle over a little extra sugar on each side as they do so.


Perhaps because there is a higher surface-to-crumb ratio (imagine, it’s like having two bases of a regular scone, in one scone!), or because cooking in direct contact with the griddle creates a more emphatic maillard reaction, or it could be the use of mixed spice and the sugary coating... but these are delicious. Pretty, easy to make, and not fiddly at all to eat (at hanami!) just as they are, or with a little butter and/or jam. Yep, I think you might just have to make some too.

And of course this is another awesome Tokyo apartment-friendly recipe, like steamed sticky toffee pudding, not requiring an oven at all! Get in!

They keep for a couple of days in an airtight container, but since they are a baking powder-leavened quick-bread you’ll have best results if you wrap them in plastic and freeze them if you make more than will be consumed in one sitting.