Showing posts with label No-oven recipes. Show all posts

Wednesday, May 22, 2013

Lip-smacking sourdough onion rings recipe, excellent use of pour-off

The other week I was browsing around old posts on one of my favourite food thoughts sites, Joe Pastry, and found an idea that was a bit of an epiphany. Sourdough onion rings! In fact, sourdough batter fried anything! (Apple fritters, anyone? Must, must try. Perhaps even Bramley apple fritters? hmm...)


If I’m not baking sourdough bread every weekend my starter gets a bit neglected and not in the best of spirits. It’s not much of a problem as it is nicely revived after a couple of feeds but I prefer keeping it fairly active and healthy, with the idea it might help it ward off mold and off-notes. The main problem is the pour-off. I hate wasting starter and worry about the effect on plumbing even if the pour-off is thoroughly diluted and chucked down the loo instead of the kitchen sink. Pancakes are well and good, as are waffles made with sourdough batter, but it’s good to have a bit more choice.


Looking around, regular onion ring recipes often include eggs in the batter. Some use them simply mixed in with flour and others have the yolks mixed in first and the whites whipped to stiff peaks before folding into the batter, yet more batters use beer.

Sourdough starter has a couple of good things going for it as use as a batter aside from the fact you may have been about to throw it out anyway – the processes of the yeast and bacteria thriving in the starter produce lactic and acetic acids and alcohol and so there is a wonderful vinegary tang already in the batter, before, as any self-respecting Brit would, the fried product is liberally doused with vinegar at the table. I would go as far as to say that depending how sour your starter is when you poured off the portion to use for this recipe, you might not even need additional vinegar at all... just sayin'.

Comparing a few sourdough onion ring recipes and attendant photos, it seems the key to having a nice thick bubble of airy batter around your ring, that adheres properly to the onion at all stages of preparation and eating, is twofold – dredge the raw rings in flour before dipping in the batter and have your oil hot enough for frying. Most recipes state the oil should be at least 175°C (340°F), and I've also seen 190°C (370°F) recommended.

Don't crowd the pan

Very excited to try this out, I sourced a little tempura pan at a local supermarket. It was about 1,800 yen (just over 10 quid), simple design with a cute rack for the temporary resting of fried goods. Of course you can use any deep fat fryer you might have, indeed the electric ones are also much safer than these old fashioned pan-of-boiling-oil setups.


Recipe for sourdough onion rings
  • About 240ml (1cup) of cold sourdough starer
  • About 60ml (quarter of a cup) of cold sparkling water
  • About 60g (half a cup) of flour
  • A large onion
  • Oil for frying (canola, etc)
  • Salt and pepper
  • Any exciting seasonings you want to add such as paprika, garlic salt, chilli flakes etc.
All measurements approximate, adjust depending on how thick and sour your starter is. You want a consistency thick enough to cling to the onion, similar to pancake batter. Starting with a cup of sourdough starter gave me enough batter for a bit more than just 1 large onion. Original recipes referenced include the Joe Pastry example and this from La Brea Bakery's Nancy Silverton.

Method:
  1. Slice your onion as thick/thin as you'd like, my slices are about 1 cm thick and I separated out the rings so they had about 2 layers each. I left the smaller center rings intact as little solid discs.
  2. Put the rings into a shallow dish of seasoned flour, turning them over to have the flour stick to the juicy bits of the sliced onion.
  3. Mix your starter with the sparkling water in a smallish bowl along with any seasoning you want to use. I've seen recommendations to rest the small bowl inside a larger bowl that contains ice water/rest a metal bowl on a frozen gel pack, or like when you make tempura you could put a couple of ice cubes directly into the batter to keep it cold. The idea is that cold batter helps to create a crispy fry. I used the 'bowl over an ice water bath' method for these rings but I think you’d also probably get quite good results by using cold ingredients fairly quickly.
  4. With your oil between 175 – 190°C (340-370°F. Use an infrared thermometer to be sure, or test the oil. The oil won’t be bubbling until the food is introduced), reduce the heat if necessary to avoid going too hot and take a slice of onion from the flour, drop it in the starter mix and turn to coat if necessary. Lower them one by one into the hot oil carefully using cooking chopsticks or tongs. 
  5. Use a metal strainer or slotted spoon to turn the rings over and fry for about 3 minutes or until they are slightly golden. Note that the temperature of the oil will drop temporarily each time you add something, so take care to do just a few at a time and keep your oil in the frying range or your rings will be greasy.
  6. Remove with the strainer or slotted spoon and transfer to kitchen paper to drain briefly. Salt to taste.


Keep finished rings warm and crispy in an oven at 100°C while you finish off the batch. Apparently you can freeze them and reheat them in the oven, but we didn't leave any to test this theory.

For people reading this who don’t currently own a sourdough starter, here is a non-sourdough onion ring recipe to try.

A couple of additional points I feel duty bound to relate. I was a tad nervous about having boiling oil in my kitchen. I made sure the work area was clear, the cats were not around me, I checked the amount of oil recommended to use for the size pan I have and used no more to avoid spillage. I also used an infrared instant read thermometer to check that the oil wasn't getting too hot. Smoke points and flash points for oils vary. The generic サラダ油 salad oil (usually a mix of canola and soybean oil) is most frequently used for deep frying here in Japan and has a flash point of 360°C (680°F). 天ぷら油 tempura oil is usually a mix of sunflower and sesame oils and is listed on this site as igniting from around 360 – 380°C (680-716°F). Both of these are somewhat far from the up to 190°C (370°F) I was aiming to maintain, but drips of oil falling onto the flames can cause fires even when the main body of oil in the pan is at a safe temperature.

So point number one: be safe, use a thermostatically controlled electric fryer if possible, and check how much oil your pan permits for safe use (usually no more than a third full). Don’t over-heat the oil causing it to smoke, and if it starts to smoke, then stop and turn off the heat before it sets alight. Never throw water on boiling oil and don’t try to move a pan that is on fire. Old advice about damp tea-towels is no longer recommended in the UK, the official recommendation of the fire service in the event of a pan on fire is to turn the heat source off if it is safe to do so, then get out and stay out and call emergency services.

Electric deep fryers are available in Japan, but many people still use the traditional type of tempura pan I used, and hence the most common cause of kitchen fires in Japan is from cooking tempura. The official line on kitchen fires from many ward offices is still to use a wet towel to extinguish a fire, and there are things such as this fire extinguishing flower that you throw into the pot, other advice recommends using a lid to try to extinguish a fire. Though I hope you'll never need it, the fire service number in Japan is 119. Some useful info here on the US embassy's site about calling emergency services in Japan.

Secondly: be a mensch, don’t pour the used oil down the drain. The oil will solidify and can block drains and sewage pipes. In Tokyo we are advised by our ward office to let the oil cool and pour it into a container such as an old milk carton that has scrunched up newspaper or fabric inside it, then tape the carton shut and put it in with your burnable rubbish. You can also get an oil coagulant which allows you to put the oil in solid chunks straight into the burnable rubbish.

You can use your oil a few times for frying, particularly if you strain it each time. But the oil will eventually become rancid with use and exposure to air. (Though apparently, the frequently retold rumour that repeated use of cooking oil produces of trans fats is untrue as long as the oil was not partially hydrogenated to start with. If you want to check the Japanese label of your oil, partially hydrogenated in Japanese is 部分水素化 bubun suisoka).

I've read on Japanese forums discussing tempura that using oil 3-4 times is a pretty good rule of thumb, but it depends on what you fry. If the oil becomes dark and starts to smell bad then it’s certainly time to throw it away.

Phew I had no idea when I started this post that it would turn into such a mammoth investigation of frying! Goodness me. Enjoy!


Thursday, March 28, 2013

Welsh cakes for hanami in Tokyo (recipe!)

This post would perhaps best have been made on March 1st to celebrate St. David’s day, the patron saint of Wales. Welsh cakes are delicious any time of year, but they come to mind when the daffodils, a symbol of Wales, are blooming in March along with the cherry blossoms.


Welsh cakes (picau ar y maen in Welsh) are a type of scone, flavoured with dried fruit and mixed spice, rolled out a little more thinly than regular scones and cooked on both sides on a traditional bakestone or a hotplate or just in a frying pan instead of being baked in the oven. When they are done they should be a reddish-brown on both sides and cooked all the way through. You sprinkle them with a little sugar while they are still warm, and it sticks to the surface in a shimmery layer.


The 'correct way' to make Welsh cakes is fiercely contested, with many families swearing by their Grandmother's particular method, adding candied peel, using baking powder and extra bicarbonate of soda, with or without eggs. See here for a highly amusing challenge to the authenticity of the wife of last year's US presidential candiate Ann Romney's Welsh cakes.


In the UK, Welsh cakes are often made with half of the fat being butter and half being lard, and they are traditionally cooked using a little lard to grease the plate. Since lard isn’t all that easy to come by in Tokyo, this recipe is for all-butter Welsh cakes. If you have access to lard you might want to try it as it will give a lighter, flakier result.

Welsh cakes. Adapted from the original Delia Smith recipe here for those of us without self-raising flour.

Ingredients
  • 220g plain all-purpose flour
  • 2 level-teaspoons of baking powder
  • 1/2 teaspoon of salt
  • 1 level-teaspoon mixed spice
  • 75g caster sugar
  • 110g butter
  • 110g raisins (or mix of raisins, currants, candied peel)
  • 1 egg
  • a little milk
  • extra butter for cooking

Method
  1. Sieve the flour, baking powder, salt and mixed spice together in a large bowl. Distribute the baking powder evenly through the flour by giving it a quick stir with a metal whisk or a fork.
  2. Add the butter in small cubes and rub it into the flour until it resembles breadcrumbs - a few bigger bits of butter here and there are fine.
  3. Stir in the caster sugar and the dried fruit.
  4. Beat the egg lightly and cut it into the mixture with a round-bladed knife.
  5. If the dough doesn't start to come together after cutting and mixing with the knife, add a small splash of milk or two and mix until it does. The dough shouldn't be too wet or sticky.
  6. Turn out of the bowl and knead very briefly until it has come together. 
  7. Press the dough ball slightly flat on a lightly floured surface and roll out until it's between 1/2 - 1cm thick. They puff up slightly when they cook.
  8. Use an upturned glass or round cookie cutter about 6cm wide to cut out discs of dough.
  9. Add a little butter to your pan and heat to medium-hot.
  10. Transfer the cakes to the pan and cook until browned but not burned on the under-side. Use a spatula to gently lift an edge of one after a minute or so to check they aren't browning too quickly. 
  11. When they are ready to turn over the tops will still be doughy but the base will be firm enough to give you purchase to slide under and flip them over. Use a knife and a spatula to make it easier to maneuver.
  12. They should take 2-3 minutes on each side and you can then transfer them to a rack to cool and sprinkle over a little extra sugar on each side as they do so.


Perhaps because there is a higher surface-to-crumb ratio (imagine, it’s like having two bases of a regular scone, in one scone!), or because cooking in direct contact with the griddle creates a more emphatic maillard reaction, or it could be the use of mixed spice and the sugary coating... but these are delicious. Pretty, easy to make, and not fiddly at all to eat (at hanami!) just as they are, or with a little butter and/or jam. Yep, I think you might just have to make some too.

And of course this is another awesome Tokyo apartment-friendly recipe, like steamed sticky toffee pudding, not requiring an oven at all! Get in!

They keep for a couple of days in an airtight container, but since they are a baking powder-leavened quick-bread you’ll have best results if you wrap them in plastic and freeze them if you make more than will be consumed in one sitting.


Thursday, January 31, 2013

Steam vs. bake - The sticky toffee pudding trials

Sticky toffee pudding, known in some countries as sticky date pudding, is another classic British comfort food like jam roly-poly that reminds me of school dinners (which is what we call school lunch in the North of England). It’s traditionally steamed in a pudding bowl, but is more like a cake than a pudding. Certainly it is more like a cake than Japanese プリン / pudding. Made with the dried fruit, nuts and wintery spices like cloves, served hot with a warm caramel toffee sauce poured over - it might look a bit inelegant but it’s shockingly good.


It isn't unusual for people to huddle possessively over their bowl until it’s finished. It was just such a reaction from a friend I had eventually made the pudding for that produced one of the first inklings that I might have a chance at making my little business idea work - She was so profoundly happy to taste it again after years living in Japan.

Though the pudding was traditionally steamed, most recipes you find today are for baking it. I was curious to see if there would be much difference to the end result between steaming and baking the sticky toffee pudding, and to see which would be better. If the steaming is good, I also thought to myself, then it means this is one traditional British dessert that can even be made in those Japanese kitchens that don't have an oven!

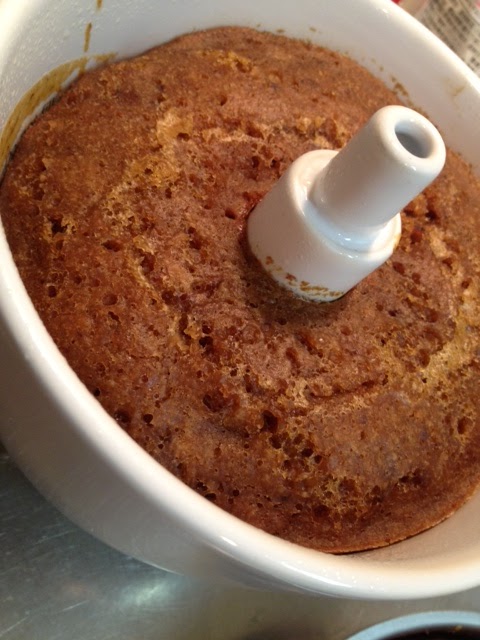
Sticky toffee pudding steamed in a pudding basin

The same sticky toffee pudding recipe baked in the oven

I used exactly the same recipe for each pudding, adapted from Felicity Cloake's in-depth investigations into some of the most well known versions.

This amount in the recipe made enough to divide between my 600ml pudding basin and a 14cm heart-shaped cake tin.
If you're only going to be baking then Felicity suggests a 24cm x 24cm square baking dish.
If you're only steaming then either do 2 smallish puddings in 500ml capacity basins or use one large 1-1.5 litre basin and adjust steaming times accordingly. If you don't have a pudding bowl any good solid, deep and heatproof bowl with a rim around the top to help keep the string in place will do.

Ingredients for the sponge:
  • 175g dates, stoned and barely chopped (I like chunks of date in the pudding)
  • 1 tsp bicarbonate of soda
  • 200ml boiling water
  • 100ml brandy (or just use 300ml boiling water/weak tea)
  • 50g unsalted butter, softened
  • 80g light brown sugar
  • 80g dark brown sugar
  • 2 eggs, beaten
  • 1/2 tsp vanilla essence
  • 175g plain flour
  • 1 tsp baking powder
  • 1/2 tsp ground cloves
  • 1/2 tsp cinnamon
  • 75g walnuts
  • Pinch of salt
Ingredients for the sauce:
  • 115g unsalted butter
  • 75g caster sugar
  • 40g dark brown sugar
  • 140ml double cream
  • Pinch of salt

Method (if baking):
  1. Pre-heat the oven to 180°C and roast the walnuts for 5-10 minutes. Butter your baking dish.
  2. Make the sauce by putting all the ingredients into a pan with a pinch of salt and heating slowly until the butter has melted, then turn up the heat and bring to the boil. Boil for about 4 minutes, until the sauce has thickened enough to coat the back of a spoon. Pour up to half the sauce into the base of the dish and then put it in the freezer while you make the batter.
  3. Put the dates and bicarbonate of soda in a heatproof dish, pour over the boiling water and add the brandy if using. Leave to soften while you make the batter.
  4. Beat together the butter, sugar and salt with a hand mixer until fluffy. Add vanilla essence to the eggs and beat them into the mixture a little at a time. In other bowl sift together the flour, baking powder and spices and then fold these into the mixture until just combined. Add the dates with their soaking liquid and the walnuts, and mix well. The batter will be a little looser than regular cake batter.
  5. Take the dish out of the freezer and pour the batter on top of the toffee sauce. Bake for 30 minutes, until a skewer inserted into the cake part comes out clean (though remember you might get some of the sauce on the end of the skewer).
  6. When the pudding is ready turn it out onto a dish to serve. Serve with a jug of warmed sauce for pouring, or poke a few holes in the sponge and pour over the rest of the sauce. Serve in bowls as it is, or with ice cream or custard. Alternatively you can let it cool down and reheat it and the sauce in the microwave if you're not serving it immediately.


Method (if steaming):
  1. Prepare a large pan of water for steaming and a buttered pudding basin. If your basin doesn't have its own lid watch this video to see how to make one from foil and buttered parchment.
  2. Roast the walnuts for 5-10 minutes in an 180°C oven - optional, turning the oven on just for this part feels a bit wasteful, but gently roasted nuts do add a nicer flavour than raw nuts.
  3. Put the dates and bicarbonate of soda in a heatproof dish, pour over the boiling water and add the brandy if using. Leave to soften while you make the batter.
  4. Beat together the butter, sugar and salt with a hand mixer until fluffy. Add vanilla essence to the eggs and beat them into the mixture a little at a time. In other bowl sift together the flour, baking powder and spices and then fold these into the mixture until just combined. Add the dates with their soaking liquid and the walnuts, and mix well. The batter will be a little looser than regular cake batter.
  5. Pour the batter into your buttered basin up to about halfway (or as your basin indicates), to give the pudding room to rise. Seal the basin with its lid, or prepared pleated foil and parchment (as described in the video above). Tie the string to make a handle for removing the hot basin later and lower into the pan of simmering water, onto something like an upturned saucer - see photo above. Make sure there is 1cm or so clear between the inside of the pan and the basin and that the hot water comes up to about halfway up the outside of the basin (or as your basin indicates). Cover the pan with a lid, or foil and steam until a skewer inserted comes out clean.
  6. My pudding basin is medium sized at 600ml and it has a hole through the middle like a bundt cake, to help steam quickly and so my pudding was ready in about 45 minutes. If you are using a traditional pudding basin without a hole and/or if you are making a larger pudding then steaming may take 1-2 hours. You might also need to top up the boiling water during the steaming time, keep an eye on it to make sure the water stays high enough to cook the pudding and that you don't boil dry.
  7. Make the sauce by putting all the ingredients into a pan with a pinch of salt and heating slowly until the butter has melted, then turn up the heat and bring to the boil. Boil for about 4 minutes, until the sauce has thickened enough to coat the back of a spoon.
  8. When the pudding is ready turn it out onto a dish to serve. Poke a few holes in the sponge and pour over the sauce. Serve in bowls as it is, or with ice cream or custard. Alternatively you can let it cool down and reheat it and the sauce in the microwave if you're not serving it immediately.


The verdict - (Steamed pudding in the first photo, baked one in the second)

The steamed pudding won. It won so majorly that I barely had time to take this photo of the last piece in the bowl at the party I took it to :) Hurrah! Although the baked version was quicker and also delicious, the steamed pudding was fluffier and remarkably moist. The oven-baked pudding was more intensely sweet all-over perhaps because of the sauce baked into the base, whereas the steamed pudding had more variety in tastes and texture. The baked pudding had a closer crumb, where the steamed pudding was open and springy.

Perhaps next time I'll try putting some sauce in the base of the steamed pudding basin - I was afraid I wouldn't be able to get it out of the steaming mould... I've also seen interesting things along the lines of tarte-tatin with caramelised apples or pears in the base of the pudding. More comfort food experiments ahead to keep us warm in the Tokyo winter months!


Tuesday, August 14, 2012

Hagura uri asazuke - light Japanese pickles

As promised in the Hottarakashi Noen Farm field trip post, here is how to make asazuke / 浅漬け / light Japanese pickles. 浅い / asai means light, or shallow in Japanese. (This post is a bit off-topic, not being about baked goods and all, but I thought it was interesting to share.)


You can use cucumber, celery, Chinese cabbage, daikon radish etc., but for this post I'm making it with a kind of gourd called hagura uri / はぐら瓜 which I received as part of my vegetable box delivery from Hottarakashi Farm last weekend. I had no idea it was SO easy!

You'll need:
(adapted from original recipe here in Japanese)
  • 1 large hagura uri, or two medium sized ones
  • 2-3 teaspoons of salt
  • Fresh root ginger, sliced thinly
  • Dried red chillies, sliced thinly
  • Salted kombu (see below)
  • Ziploc bags

塩昆布 / Shio kombu

Kombu is dried kelp, a kind of seaweed. 塩昆布 / shio kombu / salted kombu is strips of kombu cooked in soy sauce, salted and dried. Kombu is high in glutamic acid, which is the amino acid responsible for the mysterious 5th taste of 'umami', and is used in a lot of Japanese cooking to enhance the flavours of other ingredients. Which I guess is what it is doing in this pickle dish.

Thoroughly wash and chop the ends off your vegetable. (Check out the sticky stuff beading out of the uri! It looks like a cucumber, tastes a bit like a cucumber, but the texture is more like melon. With the Latin name of Cucumis melo var. makuwa it's not surprising.)


I then took a vegetable peeler and peeled off strips of the skin, to be left with pretty intermittent stripes down the length of the uri. Now scrape out all the seeds. These came out very easily with a spoon, like a melon.


Chop and slice into chunks the size and shape you'd like to have.


Put the slices into a large bowl and toss them around in the salt. Divide the slices into Ziploc bags and flavour them thusly: either use a pinch of all three of the flavourings (kombu, dried chilles, fresh ginger) or use just those you fancy. I experimented with using a bag of uri for each flavour, and then also did an all in one. The kombu bag and the all in one pickles were the winners in my opinion. I would note here that you wouldn't need all of the ginger shown in this picture, as it gets quite spicy with all the salt...


Try to push out as much air as possible from the bags and seal. Put them in the fridge for a couple of hours and they are ready to eat. Tasted better the next day too.

Left to right: ginger, chilli, konbu, all 3!

Since these are not true, fermented pickles, they are perishable and so you'll need to use them up within 3 days. They are good as a snack with cold beer on a summer evening, or as a side dish with your meal.

Tuesday, March 6, 2012

Hot buttered crumpets, home made - you can do it!

(Edit - Sep. 2014: You can buy crumpets at most of our "open bakery days" - see our Facebook page or website to find out more - or come for a lesson and learn how to make them yourself. The recipe we use is slightly different to the one I started off with here in 2012 :) )

Crumpets are the one thing I could never find in international supermarkets in Tokyo. I've been known to line my suitcase with them on trips back to Japan from the UK, in order to fill my freezer upon arrival - as a fairly moist product they don't keep long at room temperature. Since crumpets are currently doing so well in the ‘favourite treats’ poll on this site, I thought I'd share some recent experiments so that you can create them yourself at home too.

For those of you who aren't familiar, here's what crumpets are, and how most people "make" them ;) (Video posted to YouTube by MarcusBritish.)


There is an abundance of recipes out there, some of which involve milk, sugar, even egg(!) and melted butter in the batter. The basic ingredients though, are strong bread flour, yeast, water, salt, and baking soda. You’ll also need a heavy frying pan and some crumpet rings.

You can buy crumpet rings at Tokyu Hands, alongside a range of different sized egg and pancake rings. Indeed, I read that silicone egg rings work well for crumpets, and that you can improvise with a washed tuna can with the top and bottom removed (with a tin-opener, I’m guessing). Failing all that, go free-style and make crumpet-like irregularly shaped ‘pikelets’ instead, by pouring small amounts of batter a bit at a time into the pan.

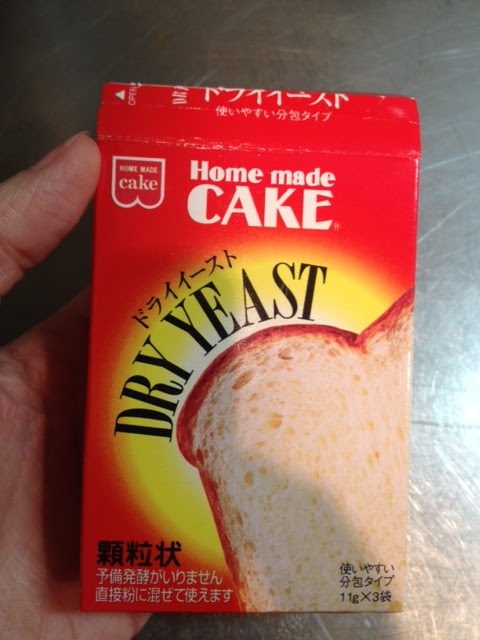
This is the most basic recipe I could find, as posted by Andy on www.thefreshloaf.com. Once I've got it just right with the basic ingredients, then I plan to experiment with sugar, milk and so on. In brackets I also included smaller measurements geared towards using just one of the 11g sachets of instant Japanese yeast.


Below the recipe you’ll also find a discussion of common problems I've either read about or experienced first hand, so you don’t have to ;)

Ingredients: (smaller batch size in brackets)
  • 500g (183g) of strong white flour
  • 10g (3.6g) of salt
  • 30g (11g sachet) dry yeast
  • 550g (202g) of tepid water
  • 1.5g (0.6g) bicarbonate of soda
  • 140g (51g) of cold water - this is best read as a guide as flours vary, my flour needed an extra splash of water to be loose enough to produce holes when cooking.
Yields 20 (about 7)
If you are using a hot-plate, the temperature should be just below 200°C. If a frying pan, use a low-medium heat.

Method:
  • Sieve together the flour and salt.
  • Dissolve the yeast in tempered water [30°C].
  • Combine these 2 in a mixer and beat on first speed for 2 (1) minutes to form a batter, then beat on second speed for 6 (2-3) minutes, or use a bowl and an electric hand mixer, or a spoon and some muscle power. If you're mixing by hand, be sure to give it a good long beating so as to form elastic gluten in the batter.
  • Cover the batter and keep warm for 1 hour bulk fermentation.
  • Dissolve the bicarb in the cold water and mix this solution well through the batter.
  • Use immediately, piping/spooning the mix into lightly-greased hoops, ready-placed onto the heated surface.
  • Pan/hot-plate should be clean and un-greased.

Serve them hot from the pan, or reheat them in a toaster/grill and serve spread with butter, with a mug of tea. Ahh!
Want more holes and a bit more colour, but getting there

Crumpet Troubleshooting Section: (further photos below)

Crumpets stick to the rings
The rings need to be free of any batter from previous attempts, they need to be greased, and then heated up standing empty in the pan before you pour in the batter. I found the best results with smoothing some soft butter on the inside of the ring with my finger (careful if you are using improvised tin cans!). If your rings are hot enough, the batter should shrink away from the rings as you cook.

My batter didn’t rise during proofing
You may have killed or weakened the yeast through excessive heat or salt, or your yeast may have been exposed to the elements and expired during storage. If you’re using Japanese instant yeast and are following Delia’s recipe, which advises heating milk to the “hand hot” stage, you may well scorch your yeast and render it useless - after investing in a thermometer, I discovered that my idea of "hand hot" was just over 50°C which is much too hot for the type of yeast I was using. Different types of yeast have different levels of endurance, but in general the optimal temperature range for baking yeast to work is 30 – 37°C. The 30°C used for the lukewarm water at the beginning of the recipe I listed here really doesn’t feel that warm at all to the touch, and so if you can get a digital thermometer (while you’re at Tokyu Hands buying the crumpet rings, maybe) it will come in very handy here, rather than guessing. Regarding salt, I have read that excessive use of salt can slow yeast down, and many crumpet recipes call for adding salt after the hour-long resting period for this reason. The ratios given in the recipe above worked for me however, so you should be fine adding the salt with the flour at the start as long as you stick to the recipe.
Finally, how warm is your kitchen? If you’re making these crumpets in the dead of winter and have placed your batter to rest near a drafty window, then the batter might get too cold for the yeast to work fast enough. You could put the bowl of batter in a cold oven with the light on, or under the light of your stove-top ventilation system if the kitchen is a bit chilly.

The crumpets are raw and doughy on the inside
Many recipes recommend a very low heat setting, and a fairly long 7-8 minute cooking time before de-ringing and flipping them over. 20-minutes in, I decided I was being too cautious with my heat setting, so I would recommend medium or medium-low. If your test crumpet forms holes within the first minute of cooking, then your temperature is probably good. You will still want to aim for the 7-8 minutes cooking time so that they can be cooked all the way through and the tops are completely dry before you flip them (soft and wet on top will cause your crumpet holes to be squished closed when flipped). Another indication of whether you have the temperature right is whether the base has browned slightly – you don’t want them too anemic on the underside. If the crumpets are too thick, then it might be hard to get the centre to cook through, also if you have only a few holes, then the heat isn't getting channeled through the body of the crumpet.

My crumpets have no holes!
Though utterly disheartening, this is your final hurdle. Firstly, is the problem no holes at all, or that they rise and then close in on themselves? If it’s the latter, then it could be that your batter wasn’t thoroughly mixed at the start when you added the yeast and water to the flour. This is the stage where your action with the wooden spoon or mixer, like when kneading bread, helps to link glutenin and gliadin molecules into long coily strands of gluten so that instead of tearing, the batter becomes elastic enough to stretch around the gas bubbles that form, and is strong enough to hold their shape when set. This is my present understanding, and it seems to work. When you are beating the batter, you will start to see a change in consistency to a noticeable elasticity, and if you pull the spoon or beater away from the mixture, you can see the batter has become slightly stringy. If the crumpets don't produce enough holes at any point, it could be because the batter is too thick – I added a little more cold water with baking soda to my first-attempt batter and the holes in the top appeared quite soon after the pouring. I’d recommend starting with just one crumpet first so that you can get the batter thickness that allows the holes to form, and then continue with the rest of the batch.

I’ll tell you a secret: it’s ok to fail at your first few attempts at making crumpets. I read somewhere (on the internet, so it must be true) that the “English muffin” was an American re-branding of a failed crumpet, certainly I'd not heard of them when I lived in the UK.., and almost all comment sections of online crumpet recipes are laden with tales of crumpet woe - particularly regarding lack of holes. I’m hoping however, that I’ve done enough testing and research that you’ll be sufficiently well-armed to get it right first time.

Looking forward to hearing how it goes for you - do let me know!

My favorite crumpet battle stories
http://bewitchingkitchen.com/2011/07/28/a-tale-of-two-crumpets/
http://helengraves.co.uk/2009/06/crumpet-fail/

Excellent crumpet recipes:
http://www.thefreshloaf.com/node/15953/crumpets-and-muffins (as used above)
http://www.kingarthurflour.com/recipes/crumpets-recipe
http://www.deliaonline.com/recipes/type-of-dish/sweet/home-made-crumpets.html
http://www.europeancuisines.com/England-English-The-Best-Crumpet-Crumpets-Recipe


---- Update! ----

I made another attempt, with a slightly hotter pan, and thinner batter, and behold! More holes! holes inside holes!
We're really getting there - holes inside holes! And no poking!

I noticed that bubbles form quite quickly, popping and sealing over at first. Once the batter is drying out the popped bubbles retain their shape - as you can see happening round the edges first in my video.


This continues happening, spreading to the middle of the crumpet, and once the whole thing is set on top you're ready to flip. Since the inside might still be a bit unset at the top, you don't want to leave the flipped crumpet on the holey side for too long, as the weight of the thing might squish your precious holes. Now this is pretty good I'll experiment with the best taste, trying milk and sugar etc. Good luck with yours! If you get stuck, don't forget, you can come to Mornington Crescent Tokyo for a lesson!