Showing posts with label Spring. Show all posts

Wednesday, February 5, 2014

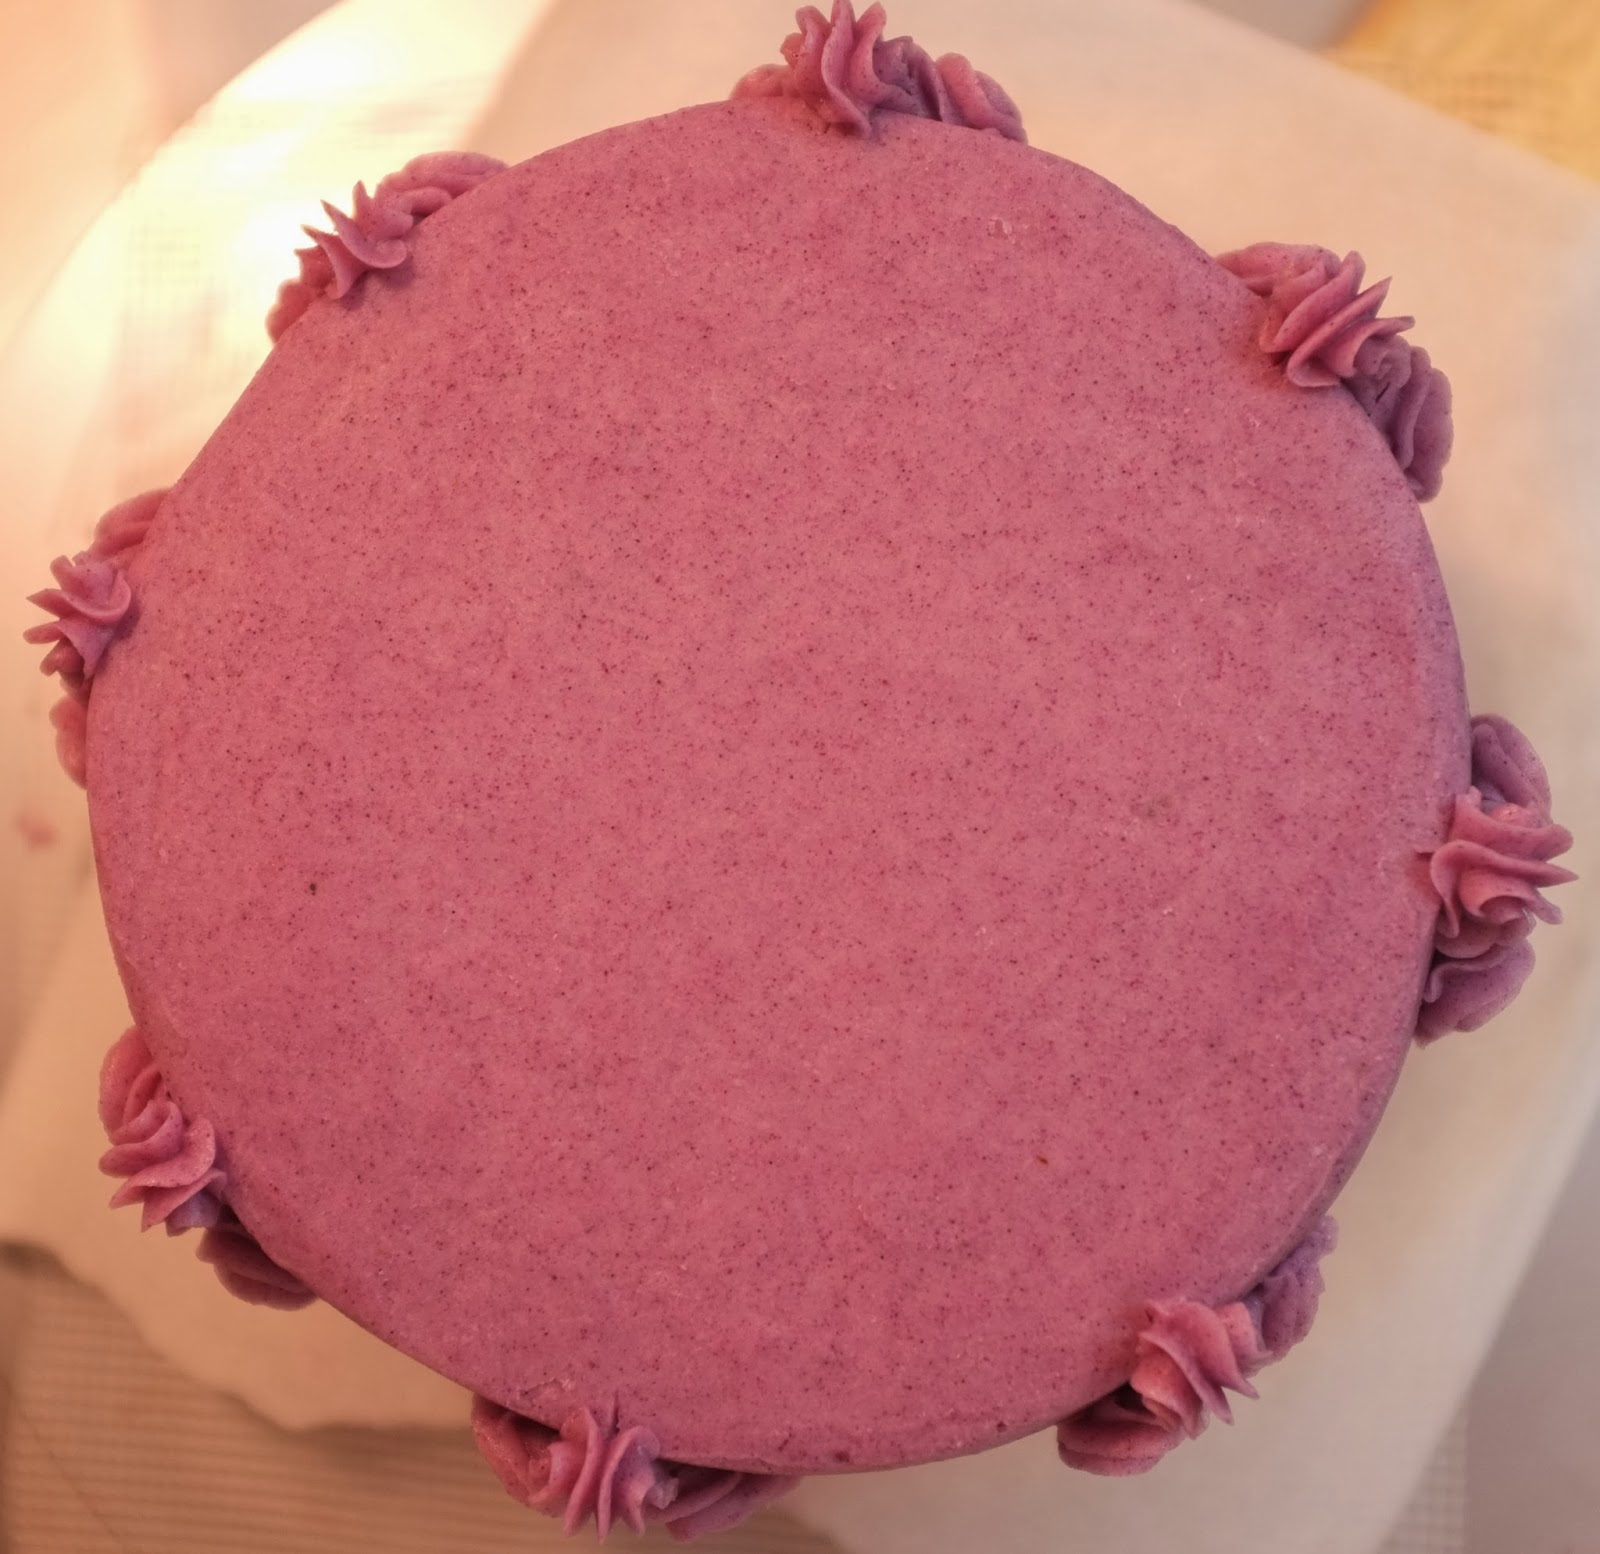
Murasaki imo buttercream birthday cake

I'm currently looking for a space for my business (exciting stuff, what!), but the other day a friend asked me to make a special birthday cake for a friend.

After looking at various chocolate and carrot cake recipes I based the cake on this amazing 3-layered Victoria sponge cake by Peggy Porschen. I didn't want to use food colouring in this cake, and I didn't want to use quite as much buttercream as the original recipe, we also wanted something that looked more contemporary than classic, to match our friend's personality.


The gorgeous purple colour is all from powdered murasaki imo (purple potato) which is often used in confectionery in Japan (it is even a Haagen Daz flavour). I had most if 20g sachet left over from recent macaron experiments and didn't need the full amount. It imparts a very delicate sweet and earthy flavour to the buttercream, very nice. I also liked that you can still see the vanilla seeds in the mixture. 


A handy tip when using real vanilla beans is to rub the beans from the scraped pod into some of the sugar you are using in the recipe, in this case icing sugar in the buttercream, as it will help to avoid too many of the seeds clumping together.

Rubbing vanilla seeds into the sugar

The process of making the cake is very thoroughly explained in the linked-to recipe above. Here are some photos showing the step-by-step process as I took it. First trimming, filling and stacking the sponges. The first layer is spread with raspberry jam and the next with a portion of buttercream I'd kept separate from the murasaki imo powder.


Next came smoothing on a crumb-coat, an undercoat for the buttercream, to help make the final layer as smooth and straight as possible. Once you have the thin crumb-coat on, you chill the cake before applying the next layer.
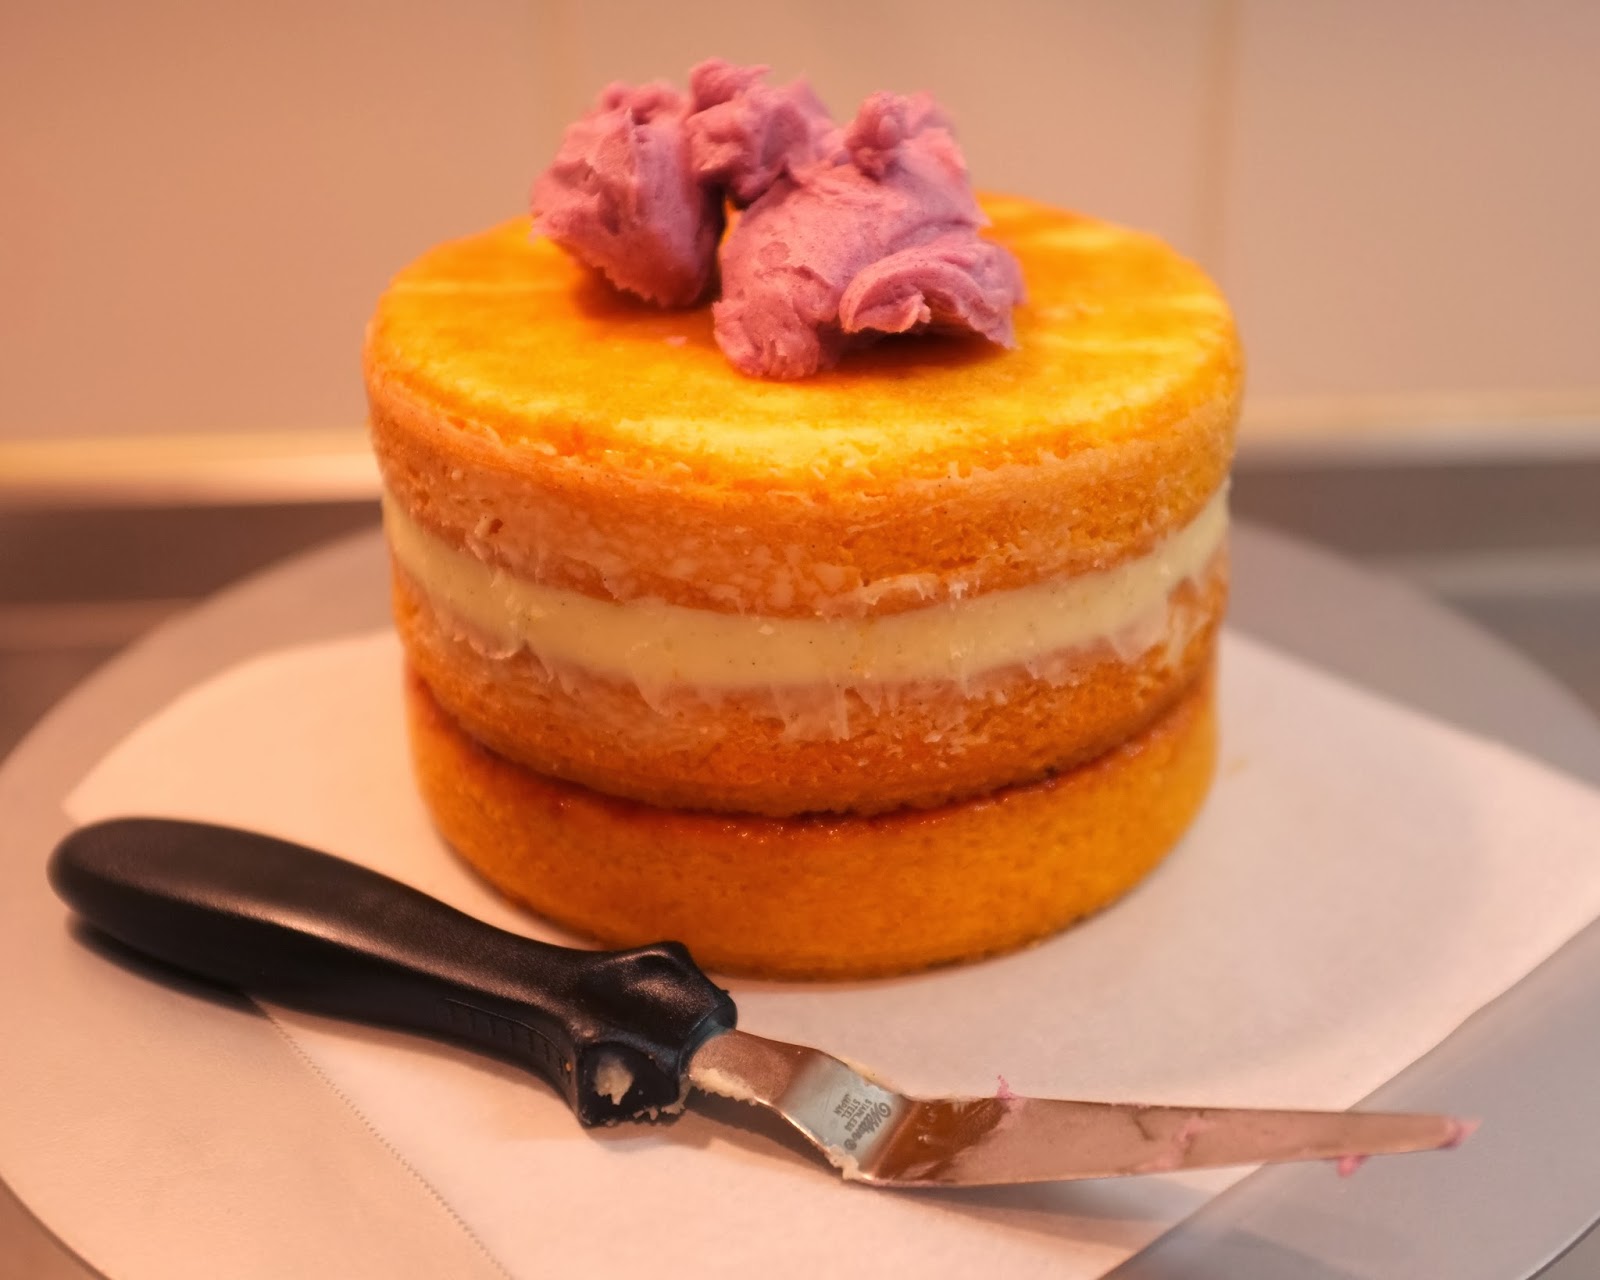


Crumb coating of buttercream

While the cake was chilling between coats I had a bit of a practice piping the fleurs-de-lis on a dummy cake, but I rather feel that lots of practice is required to get the gracefully-sweeping shells of the original recipe.

Practice, practice...
 
Divide the cake in advance to know where to pipe


To avoid having too much buttercream on the cake, I topped it with a purple anemone (wind flower) I'd made out of gum paste somewhat loosely based on one I'd seen in the supermarket a few days earlier.


Just being the one flower I was able to bend the floral tape-wrapped wires around to make a kind of stand for it to lean on, so we could place it directly on top (usually you would insert a flower spike into the cake itself and put your fresh or sugar flowers into that plastic spike). The gumpaste rested on the buttercream just fine - I had wondered whether the moisture in the frosting would soften the gumpaste, but it held up fine when I tested a batch for 24 hours.


This was quite an extravagant version of a Victoria sponge cake. With the real vanilla, vanilla syrup-soaked sponges, multiple layers and lots of buttercream, it certainly fit the bill for an extra special birthday cake!

Making the vanilla syrup

Sunday, June 2, 2013

Fibonacci cake, a golden ratio Battenberg. Challenge accepted!

While honing my Battenberg neatening skills recently, my partner declared that I *must* turn the Battenberg into a golden ratio cake. Indeed, a Battenberg isn't quite fiddly enough ;)


The Fibonacci sequence is where each number is the sum of the previous two numbers, that is: 0, 1, 1, 2, 3, 5, 8, 13, 21, 34, 55 and so on. Examples of the golden spiral are found in nature and can be incredibly beautiful.

To quote a particularly alliterative Melvyn Bragg from his In Our Time programme on the topic
"The Fibonacci sequence is found to appear time and time again among the structures of the natural world, and even in the products of human culture. From the parthenon to pine cones, from the petals on a sunflower to the paintings of Leonardo da Vinci, the sequence appears to be written into the world around us".

Tasty maths!

There are quite a few cakes online that depict the famous Fibonacci sequence, and it’s quite interesting to see how different people have approached it. There is also this cute Mondrian cake which looks a little like a Battenberg variation, and this pretty amazing Rubik's Battenberg but I’ve yet to find a Fibonacci Battenberg exactly. Hmm would it be a Battenacci, or a Fibonberg..?


I decided I wanted it to be recognisable first and foremost as a Battenberg, and that part of the fun would be revealing the inherent mathematical layer of beauty of the thing through the decoration. 5cm square cross-section is about as big as my cake tins could take me, and it works out nicely as a slightly diminutive slice of Battenberg, where 8cm would start to become a bit of a monster cake. With an inability to work with infinitely smaller planks of cake that the making of a true golden spiral might require, I decided to start with 1cm square units and work up from there.

All right then, are we ready?


Fibonacci Battenberg recipe - yields 2 cakes

Equipment you’ll need:
  • A cake cutter, and/or long knife
  • A clean ruler or tape measure
  • Cocktail sticks/skewers to mark the cake
  • 1 or 2 20cm square cake tins that are at least 5cm deep
  • Rolling pin
  • Pastry brush
  • Baking parchment and plastic wrap
  • About 3 hours..
  • A maths nerd to present the cakes to

Trusty equipment and colouring. I used pink gel, but a little red also works

Ingredients for the taller yellow sponge:
  • 350g very soft butter
  • 350g caster sugar
  • 330g flour
  • 20g/5tsp baking powder
  • 0.5tsp salt
  • 6 eggs
  • 0.5 tsp vanilla extract

Ingredients for the pink sponge:
  • 175g very soft butter
  • 175g caster sugar
  • 165g flour
  • 10g/2.5tsp baking powder
  • 0.25 tsp salt
  • 3 eggs
  • 0.5 tsp vanilla extract
  • 0.5 tsp almond extract
  • A little red or pink food colouring

Additional ingredients:

The yellow sponge will come right up to the top of the tin when baked

Method:
  1. Grease and line the cake tin(s) with baking parchment. Preheat the oven to 160°C.
  2. Make the yellow sponge. - Sift the yellow sponge's amount of flour, baking powder and salt into a very large bowl and mix well.
  3. Add the soft butter, sugar, vanilla essence and eggs all into the same bowl and whisk together until just combined. (If you're using a stand mixer however, it's best to sift the dry ingredients on top of the wet ingredients to avoid a layer of flour at the bottom of the mix. Mix on the lowest speed.)
  4. Scrape the mixture into a prepared tin, spreading to the corners and bake for about 1 hour, reducing temperature part way if it browns quickly.
  5. Repeat steps 2-4 for with the pink sponge ingredients and bake for 25-30 minutes. (If you're reusing the same tin, cool it down with some cold water before using it again.)
  6. While the sponges are baking, make the marzipan if you're making your own. 
  7. With the two squares of sponge out of their tins and completely cool, cut off the browned tops of the cake and any sloping edge pieces. You want your yellow cake to be 5cm high, and the pink cake to be 3cm high. (Tip – if this is tricky, then chill or partially freeze the sponge and it will be easier to cut straight lines. Also, save the cuttings to crumble up with frosting to make cake pops.)
  8. Use a toothpick to make indents at the top and bottom edge of the sponge to mark out the following long rectangular blocks and cut them carefully from the main block. 
    • From your yellow sponge: cut two 5cm-wide strips, creating planks of sponge that are 5cm square in cross-section. Also cut 2, 2cm square planks and 2, 1cm square delicate strips. When maneuvering the delicate strips, guard against breakage by rolling them sideways onto something like a long blade rather than picking them up by their ends.
    • From your pink sponge: cut 2, 3cm square planks and 2, 1cm square delicate strips. 

Being a bit punctilious helps ;)

The order I used to stack the cake (you'll be doing it with jam)

Assemble the cake:
  1. Roll out the marzipan to at least 25cm x 30cm. If it’s sticky, roll it between two sheets of plastic wrap, peeling the top layer off when you’re ready to wrap the cake. 
  2. Heat the jam and paint sides of all the sponge strips, glueing them together with the jam as you stack them into a golden ratio rectangle (see the order I used above, but use what works for you). It will be slightly less sticky if you avoid painting the outside faces of the planks until you’re ready to wrap the thing, but it’s not a terrible problem if you paint a side too early as they will all need jamming up in the end. Working on baking parchment will also make it easier to move it to the marzipan later.
  3. Position the whole sticky block of planks onto the center of the marzipan, upside down - you want the marzipan seam to end up on the bottom.
  4. Paint the top with lots of jam and fold up the sides of the marzipan up to make a join on the top. Trim any large excess and smooth over the join.

Roll out about a 25cm x 30cm sheet of marzipan

Ooh yeah! We're jammin', jammin' (Sorry ;) )

Use the plastic wrap to help if your marzipan is at all thin or sticky

  1. To finish, turn the cake the right way up and give the marzipan a final squeeze to make sure it’s all nicely stuck to the jam. With a sharp knife, cut off a thin slice from each end of the log to reveal a neat presentation of the cross-section form each end. 
  2. Decorate the marzipan if you wish, by making indentations with a fork, pinching the edges to make a ruffle and/or demarcating portion sizes on top. Sprinkle with icing sugar if you like.
  3. Present slices of your masterpiece with mathematically almost-accurate golden ratio swirls of melted chocolate, jam, whipped cream, a rope of marzipan or something else that takes your fancy. Or even better, provide the tools to let your guest create the beautiful spiral themselves.

Otsukaresama deshita :)


Battenberg recipes referenced
http://www.bbcgoodfood.com/recipes/1120657/battenberg-cake
http://www.bbc.co.uk/food/recipes/battenburg_cake_60878

--
Options:

- I chose to use an all-in-one mixing method rather than creaming the butter and sugar together first, as it should result in a flatter top and it’s quicker so will save a little time in this fiddly project.

- Another time saver would be to mix up all 9-eggs worth of batter in a large stand mixer and estimate 2 thirds of it for the yellow sponge before colouring the remainder.

- A final option would be to make just one fibonacci cake by making up just one 6-egg batch of sponge, and dividing your baking tin in two with a folded piece of parchment (see here for how) and being very careful when you’re pouring in the batter. Pour half in one side of the tin, then colour the remaining half and pour it in the other half. You'd just need one of each 'plank' size in that case. This is a bit fiddly, and since Battenberg freezes well I decided to make it a bit easier on myself and just made two.

A mathematically inelegant remainder...

Thursday, March 28, 2013

Welsh cakes for hanami in Tokyo (recipe!)

This post would perhaps best have been made on March 1st to celebrate St. David’s day, the patron saint of Wales. Welsh cakes are delicious any time of year, but they come to mind when the daffodils, a symbol of Wales, are blooming in March along with the cherry blossoms.


Welsh cakes (picau ar y maen in Welsh) are a type of scone, flavoured with dried fruit and mixed spice, rolled out a little more thinly than regular scones and cooked on both sides on a traditional bakestone or a hotplate or just in a frying pan instead of being baked in the oven. When they are done they should be a reddish-brown on both sides and cooked all the way through. You sprinkle them with a little sugar while they are still warm, and it sticks to the surface in a shimmery layer.


The 'correct way' to make Welsh cakes is fiercely contested, with many families swearing by their Grandmother's particular method, adding candied peel, using baking powder and extra bicarbonate of soda, with or without eggs. See here for a highly amusing challenge to the authenticity of the wife of last year's US presidential candiate Ann Romney's Welsh cakes.


In the UK, Welsh cakes are often made with half of the fat being butter and half being lard, and they are traditionally cooked using a little lard to grease the plate. Since lard isn’t all that easy to come by in Tokyo, this recipe is for all-butter Welsh cakes. If you have access to lard you might want to try it as it will give a lighter, flakier result.

Welsh cakes. Adapted from the original Delia Smith recipe here for those of us without self-raising flour.

Ingredients
  • 220g plain all-purpose flour
  • 2 level-teaspoons of baking powder
  • 1/2 teaspoon of salt
  • 1 level-teaspoon mixed spice
  • 75g caster sugar
  • 110g butter
  • 110g raisins (or mix of raisins, currants, candied peel)
  • 1 egg
  • a little milk
  • extra butter for cooking

Method
  1. Sieve the flour, baking powder, salt and mixed spice together in a large bowl. Distribute the baking powder evenly through the flour by giving it a quick stir with a metal whisk or a fork.
  2. Add the butter in small cubes and rub it into the flour until it resembles breadcrumbs - a few bigger bits of butter here and there are fine.
  3. Stir in the caster sugar and the dried fruit.
  4. Beat the egg lightly and cut it into the mixture with a round-bladed knife.
  5. If the dough doesn't start to come together after cutting and mixing with the knife, add a small splash of milk or two and mix until it does. The dough shouldn't be too wet or sticky.
  6. Turn out of the bowl and knead very briefly until it has come together. 
  7. Press the dough ball slightly flat on a lightly floured surface and roll out until it's between 1/2 - 1cm thick. They puff up slightly when they cook.
  8. Use an upturned glass or round cookie cutter about 6cm wide to cut out discs of dough.
  9. Add a little butter to your pan and heat to medium-hot.
  10. Transfer the cakes to the pan and cook until browned but not burned on the under-side. Use a spatula to gently lift an edge of one after a minute or so to check they aren't browning too quickly. 
  11. When they are ready to turn over the tops will still be doughy but the base will be firm enough to give you purchase to slide under and flip them over. Use a knife and a spatula to make it easier to maneuver.
  12. They should take 2-3 minutes on each side and you can then transfer them to a rack to cool and sprinkle over a little extra sugar on each side as they do so.


Perhaps because there is a higher surface-to-crumb ratio (imagine, it’s like having two bases of a regular scone, in one scone!), or because cooking in direct contact with the griddle creates a more emphatic maillard reaction, or it could be the use of mixed spice and the sugary coating... but these are delicious. Pretty, easy to make, and not fiddly at all to eat (at hanami!) just as they are, or with a little butter and/or jam. Yep, I think you might just have to make some too.

And of course this is another awesome Tokyo apartment-friendly recipe, like steamed sticky toffee pudding, not requiring an oven at all! Get in!

They keep for a couple of days in an airtight container, but since they are a baking powder-leavened quick-bread you’ll have best results if you wrap them in plastic and freeze them if you make more than will be consumed in one sitting.


Monday, March 18, 2013

Traditional English hot cross buns (+ cross experiments)

March already and Tokyo weather is behaving a bit more like spring. It's just the right time of year to make hot cross buns. Hot cross buns are a traditional English enriched, spiced, yeast-based bun usually containing currants and eaten during Easter, particularly on Good Friday. When I was growing up in the UK, they would appear in the shops from around about the end of February until the end of March, though I believe you can get now them from supermarkets at any time of year. They are similar to Chelsea buns in ingredients, or to British teacakes (of the split and toasted, spread with butter variety rather than these), which you can certainly get year-round, the difference being that the seasonal 'hot cross bun' is marked with a cross.

"One-a-penny, two-a-penny, hot cross buns!"

I knew the nursery rhyme (erm, you might not want to click that link..), but I guess I had never really given much thought before to the cross. When I started looking into the history of hot cross buns I was delighted to find a whole raft of superstition and folksy provenance dating back possibly to before the association was made with the Friday crucifixion of the Christian Easter holidays, starting perhaps with small cakes eaten during the Spring festivals of ancient Greece.

These are *magic* buns, hurrah! Share them with a friend and for that year "Half for you and half for me, Between us two shall goodwill be" They were banned, outside of specific religious holidays in 1592, and they were kept, stale, to be grated and used as medicine of dubious efficacy, and they were nailed or hooked up in the kitchen to ensure successful bakes throughout the year (that's one I'm going to have to try ;) ). What unexpected fun!


When I made pan di ramerino around this time last year I was wondering if it might be an Italian sister of the hot cross bun, due to the seasonality and the marking with a cross(es). As in Italy today, historically the spiced buns eaten around Easter in the UK used to be marked with a cross simply by slashing the loaves in this way. At some point this was replaced by a pastry cross pressed onto the dough, and now it's usually a white cross made with plain flour and water paste. Recipes tell you variously to slash a cross and then pipe the paste, just pipe the paste onto proofed balls, or to prepare a slightly thicker paste that you can roll thinly and cut in to strips to make the cross.


Ever the experimenter I tried all three, and personally prefer the look of the simply piped line of paste, with no slashing. (In the pics below, the first is the piped cross, the second image the slashed and piped, and the third is the neat strips of rolled dough, affixed with water.)

The winner - I preferred the piped crosses


Since my recent yeast-related baking activities have all been with wild yeast in the form of sourdough, these little fruit-studded buns seemed so fast and simple to make by comparison. With no feeding of a starter the day before or overnight proofings of imprecise duration, it's more or less a case of getting your baker's yeast ready in the usual way, putting all the dry ingredients in a bowl, dumping the yeast and liquids in and kneading for 5 mins.


The cross is just a paste of flour and water which you pipe on once the balls are almost ready to bake, Bob's your uncle! (There is no reason why these can't also be made using sourdough instead of baker's yeast, they might be a little crustier but you could experiment with adding more milk or butter to keep them soft.. Aha, future project.)

Here is the full recipe I used for mine, adapted from Delia's original recipe here.

Hot cross buns, ingredients:
  • 50g sugar, plus 1 level teaspoon
  • 1 level tablespoon dried yeast (about 9g)
  • 150ml warm water (ideally not too much over 40°C, over 50°C and you could start to kill off some of the yeast)
  • 450g plain flour (bread flour not required)
  • 1 level teaspoon salt (about 5g)
  • 1 rounded teaspoon mixed spice (see here for how to make your own mixed spice)
  • 75g currants or raisins
  • 50g cut mixed peel (Nissin supermarket has both lemon and orange, or make your own)
  • 40-55ml milk
  • 1 egg, beaten
  • 50g butter, melted
For the cross:
  • 75g plain flour
  • About 5 tablespoons of water
To glaze: (optional)
  • Either 2 tablespoons of sugar and a splash of hot water or a couple of tablespoons of warmed apricot jam

Method:
  1. Stir the teaspoon of sugar into the warm water, sprinkle the yeast in and leave for a few minutes to develop froth.
  2. Melt the butter and cool slightly, beat the egg with 40ml of the milk.
  3. Weigh the flour, sugar, salt, currants, mixed peel into a large bowl.
  4. Tip the yeasty water, eggy milk and melted butter into the dry ingredients and mix together. You want a kneadable consistency and so add any of the remaining milk if necessary (I didn't need it). Tip onto a lightly floured (if necessary) surface and knead until elastic and springy (about 5 minutes).
  5. Return dough to the bowl and cover with cling film. Leave for about an hour until roughly doubled in size.
  6. Tip the risen dough out and knead briefly to knock the air out of it and redestribute the nutrients for the yeast to continue their work.
  7. Divide the dough into 12 - each ball weighed about 78g for me, and form into little round rolls by cupping them one by one against the work surface and moving your hand in a circular motion (video) which should quickly pull the skin of the dough into the center underneath the ball.
  8. Set these on trays or baking parchment and cover with floured or oiled clingfilm to rise again - about 30 minutes. Pre-heat the oven to 190°C.
  9. Mix 75g of plain flour with about 5 tablespoons of water to make a thick paste and load it into a small piping bag. When the rolls are proofed, snip the tip of the piping bag and draw the paste across the buns to form the crosses. You could do this one at a time, or having lined your buns up neatly pipe the lines a while row at a time. Be careful of pushing too hard on 100-yen shop piping bags, this is a thick paste and can strain the bag at the seams.. go nice and slow.
  10. Bake for about 25 minutes, draping foil over them part way through cooking if they start to brown too quickly.
  11. When they come out of the oven, if you want them to be shiny you can brush them with sugar syrup made with a splash of hot water and 2 tablespoons of sugar (as in these photos), or if you want them shinier and sticky then brush them instead with warmed apricot jam.


The taste of the candied peel is lovely in these, I imagine that fresh zest would also be quite nice. The flavour is a bit like a lighter and moister version of a stollen, without marzipan.

They are best on the day they are made, but I'm still eating mine 2 days later toasted with butter. If you make more than you can eat or give away then they freeze quite well too if done on the day they are made - wrap in cling-film and foil. Leave to thaw at room temperature for about an hour.