Showing posts with label Sourdough. Show all posts

Friday, August 23, 2013

Test baking - professional Garnet oven at Ohkubo Shokai

Today I had a lovely time at the test kitchen of Ohkubo Shokai in Shakuji Koen - about 30 minutes from the center of Tokyo by train.

Ohkubo Shokai are the suppliers of this European-designed Garnet oven in Japan.  


In commercial terms it is a small oven (59W x 59D x 48H cm exterior), but it is able to bake to a professional standard and as such is attractive for small businesses. When I bought my stand mixer in Kappabashi the kind gents at Yoshida Kashi Douguten strongly recommended this oven to me and mentioned that test baking was a possibility at Ohkubo's test kitchen in Nerima-ku. The kitchen is big and has quite a bit of the equipment you'd need for a trial bake, such as weighing scales, whisks, bowls and sieves, hand/stand mixers, trays and oven gloves. You just take along the ingredients and any special equipment you need. 

Test kitchen at Ohkubo Shokai

I decided to test out a Victoria sponge cake, in the tradition of Mary Berry testing out home ovens when she worked for Bath electricity board, since it's quick and easy and I know exactly what they taste like from my home oven from the recent tests I've been doing. 

Afternoon tea at Ohkubo Shokai

I also made a couple of sourdoughs as I wanted to see how hot the Garnet oven could go, how well it would colour the crust and I especially wanted to try out the snazzy steam injection function.


If you want to order the steam-capable oven, you will need to have it plumbed into the water mains in your business. Steam is created when you press and hold the button which squirts water from the back of the oven which fizzles and turns to steam quite quickly. 

For my test sourdoughs I didn't spritz them at all before they went in, the crust colour and opening of the slashes is largely down to the steam injection. They did fairly well despite one being a bit over-proofed and the other under-proofed thanks to the logistical challenge of trying get the dough ready for shaping and 2nd proofing upon my arrival in Nerima following a slog through hot and humid Tokyo with a heavy bag of dough. Eeek!


A peculiar feature of the Garnet is that the heating elements (there are 2) and fans are on the right hand side instead of the back, meaning less hot air is lost upon opening the oven door compared to regular ovens. The heaters are around the fans, and so hot air is convected through the oven chamber making preheating and cooling down comparatively fast. Something I was particularly impressed with was how quickly the loaves started to colour. My home oven sometimes has trouble getting a nice crust on anywhere but the top of my sourdough boules, but thanks to the posh convection system of the Garnet, they coloured evenly all over and quickly. 


I used no baking stone or other sole-of-the-oven brick/ceramic tile tricks, yet the base of the bread was also baked and coloured nicely, despite the highest temperature on the dial being 230°C. (My home oven can go to 250°C, but only for 15 minutes, and it appears to be a different type of heat - more hot-spotty? - than the Garnet, where I found 230°C was hot enough and gave a better result than 250°C at home.) 


The Victoria sponges also baked more quickly than in the home oven, and very evenly. There was a noticeable difference in the fine and smooth surface of the cakes, and in the moistness of the crumb. It was a more refined result than I usually get from my home oven, and this was particularly interesting to me.


Reader Ryan recently asked whether a professional oven was really 20 times as good as a domestic oven, considering that the Garnet ovens I'd been writing about were about that much more expensive being just above or below 400,000 JPY depending on whether you needed steam. 

Before I did any test baking I asked the staff at Ohkubo the same question and was told that aside from the factors I'd come up with (a bigger footprint and 4 shelves = so much more output capacity, and the more robust design means that heavy daily usage is ok), the increased power along with the careful design of professional machines mean that the end result is of a much better quality and more consistent than a domestic oven. 

180°C on the dial - 180°C in the oven chamber

Having tested the oven out myself, I can confirm that the baking experience and the end result from my tests today were much, much better than what I'm used to with my pretty-decent home oven. Whether it is indeed 20 times better, and whether that cost is justifiable for any particular business will depend on how important the baked goods are to the business, how efficient you need to be and exactly what is being made.


The nifty stand/rack storage space costs extra (about 70,000 yen), although you might be able to find a cheaper option. It's also possible to stack two of these Garnet ovens together - handy for small shop spaces in Tokyo.

Because the Garnet is smaller and cheaper than a lot of professional ovens, Ohkubo have sold some to customers for use in the home - however note that because the oven is 200v at 20 amps, it can't be plugged into a regular 100v domestic socket in a Japanese house. I gather you might need to have re-wiring done, but please speak with an electrician (and your landlord for permission if necessary!) as I'm not yet clued-up on what this would entail. 

Test baking is available at Ohkubo Shokai by contacting them in Japanese or English via the form on their website to reserve a day to drop by. They have a number of interesting machines for large bakery businesses, but the Garnet oven is currently getting the most interest in terms of test baking.


Dough laminator, and other test kitchen equipment

Thursday, July 11, 2013

Traditional sourdough spotted in Shilin night market, Taipei

Being slightly jet-setty at the moment, I recently made a weekend trip to Taiwan to meet a friend in Taipei. I tried airbnb (it was a good experience) for the first time, and the apartment we rented for the weekend was close to the famous Shilin night market, so we went for a wander.

Look what we found! A bakery, open to the street that specialises in sourdough.


I think I was charmed first of all by the "green onion little cake" and the bean-filled breads that are probably the precursor of the Japanese anpan, and then I noticed it said sourdough..


The sign just outside the bakery explains in three languages that the "sour dough practice" is a traditional method of raising dough, from their ancestors.


I'm embarrassed to admit that I hadn't thought much about ancestral bread leavening practices in the far east. I must have been swayed by the national conversation in Japan about bread vs rice which generally deifies rice over bread as being more traditional and healthier, with possible slight undertones of bread being a dirty modern import (rightly so perhaps, have a look at this fascinating tale of the US's role in the increase in wheat consumption in Japan since the 1950s) Incidentally, it seems that bread is currently winning the battle in Japan with 2011 being the first year Japanese households spent more on bread than rice.

China however does appear to have a long tradition growing wheat and also of using sourdough culture to raise wheat products. The traditional Chinese characters used by the Shilin bakery (see below) were almost the same as the ones they used in the Japanese portion of the explanation.

Traditional Chinese for sourdough

How the bakery wrote it in Japanese 

老麺 / roumen these days in Japan is usually written in katakana and refers to the noodle soup dish of Chinese origin: ラーメン / ramen! Taken literally, the kanji above would mean old noodles, or perhaps 'old dough' if the word now used for 'noodles' (麺 / men) used to be a generic term for wheat dough used for any old purpose. Indeed, the second character includes the kanji for wheat (麦 / mugi) squeezed up in there on the left hand side. Perhaps this also means that various wheat-based Chinese doughs were traditionally raised by the sourdough method, including noodles. Wow a new synapse formed in my brain, I felt it! (In case you're wondering, sourdough is usually referred to as サワードウ / sawadou or 天然酵母 / tennen koubou in Japanese.)

We bought our "sour dough green onion breads" and ate them out of little paper bags walking round the market, trying to avoid the stalls selling stinky tofu. The bread was salty and delicious, with spring onions spread through the middle. When I go back sometime I'll have to try the sweet bean buns. A lovely discovery!

I don't have an address for the bakery, but it was on the outside edge of the market, along a main road, rather than inside the labyrinth of stalls. You'll come upon it soon after walking up to the market from the direction of Jiantan MRT station.

Wednesday, May 22, 2013

Lip-smacking sourdough onion rings recipe, excellent use of pour-off

The other week I was browsing around old posts on one of my favourite food thoughts sites, Joe Pastry, and found an idea that was a bit of an epiphany. Sourdough onion rings! In fact, sourdough batter fried anything! (Apple fritters, anyone? Must, must try. Perhaps even Bramley apple fritters? hmm...)


If I’m not baking sourdough bread every weekend my starter gets a bit neglected and not in the best of spirits. It’s not much of a problem as it is nicely revived after a couple of feeds but I prefer keeping it fairly active and healthy, with the idea it might help it ward off mold and off-notes. The main problem is the pour-off. I hate wasting starter and worry about the effect on plumbing even if the pour-off is thoroughly diluted and chucked down the loo instead of the kitchen sink. Pancakes are well and good, as are waffles made with sourdough batter, but it’s good to have a bit more choice.


Looking around, regular onion ring recipes often include eggs in the batter. Some use them simply mixed in with flour and others have the yolks mixed in first and the whites whipped to stiff peaks before folding into the batter, yet more batters use beer.

Sourdough starter has a couple of good things going for it as use as a batter aside from the fact you may have been about to throw it out anyway – the processes of the yeast and bacteria thriving in the starter produce lactic and acetic acids and alcohol and so there is a wonderful vinegary tang already in the batter, before, as any self-respecting Brit would, the fried product is liberally doused with vinegar at the table. I would go as far as to say that depending how sour your starter is when you poured off the portion to use for this recipe, you might not even need additional vinegar at all... just sayin'.

Comparing a few sourdough onion ring recipes and attendant photos, it seems the key to having a nice thick bubble of airy batter around your ring, that adheres properly to the onion at all stages of preparation and eating, is twofold – dredge the raw rings in flour before dipping in the batter and have your oil hot enough for frying. Most recipes state the oil should be at least 175°C (340°F), and I've also seen 190°C (370°F) recommended.

Don't crowd the pan

Very excited to try this out, I sourced a little tempura pan at a local supermarket. It was about 1,800 yen (just over 10 quid), simple design with a cute rack for the temporary resting of fried goods. Of course you can use any deep fat fryer you might have, indeed the electric ones are also much safer than these old fashioned pan-of-boiling-oil setups.


Recipe for sourdough onion rings
  • About 240ml (1cup) of cold sourdough starer
  • About 60ml (quarter of a cup) of cold sparkling water
  • About 60g (half a cup) of flour
  • A large onion
  • Oil for frying (canola, etc)
  • Salt and pepper
  • Any exciting seasonings you want to add such as paprika, garlic salt, chilli flakes etc.
All measurements approximate, adjust depending on how thick and sour your starter is. You want a consistency thick enough to cling to the onion, similar to pancake batter. Starting with a cup of sourdough starter gave me enough batter for a bit more than just 1 large onion. Original recipes referenced include the Joe Pastry example and this from La Brea Bakery's Nancy Silverton.

Method:
  1. Slice your onion as thick/thin as you'd like, my slices are about 1 cm thick and I separated out the rings so they had about 2 layers each. I left the smaller center rings intact as little solid discs.
  2. Put the rings into a shallow dish of seasoned flour, turning them over to have the flour stick to the juicy bits of the sliced onion.
  3. Mix your starter with the sparkling water in a smallish bowl along with any seasoning you want to use. I've seen recommendations to rest the small bowl inside a larger bowl that contains ice water/rest a metal bowl on a frozen gel pack, or like when you make tempura you could put a couple of ice cubes directly into the batter to keep it cold. The idea is that cold batter helps to create a crispy fry. I used the 'bowl over an ice water bath' method for these rings but I think you’d also probably get quite good results by using cold ingredients fairly quickly.
  4. With your oil between 175 – 190°C (340-370°F. Use an infrared thermometer to be sure, or test the oil. The oil won’t be bubbling until the food is introduced), reduce the heat if necessary to avoid going too hot and take a slice of onion from the flour, drop it in the starter mix and turn to coat if necessary. Lower them one by one into the hot oil carefully using cooking chopsticks or tongs. 
  5. Use a metal strainer or slotted spoon to turn the rings over and fry for about 3 minutes or until they are slightly golden. Note that the temperature of the oil will drop temporarily each time you add something, so take care to do just a few at a time and keep your oil in the frying range or your rings will be greasy.
  6. Remove with the strainer or slotted spoon and transfer to kitchen paper to drain briefly. Salt to taste.


Keep finished rings warm and crispy in an oven at 100°C while you finish off the batch. Apparently you can freeze them and reheat them in the oven, but we didn't leave any to test this theory.

For people reading this who don’t currently own a sourdough starter, here is a non-sourdough onion ring recipe to try.

A couple of additional points I feel duty bound to relate. I was a tad nervous about having boiling oil in my kitchen. I made sure the work area was clear, the cats were not around me, I checked the amount of oil recommended to use for the size pan I have and used no more to avoid spillage. I also used an infrared instant read thermometer to check that the oil wasn't getting too hot. Smoke points and flash points for oils vary. The generic サラダ油 salad oil (usually a mix of canola and soybean oil) is most frequently used for deep frying here in Japan and has a flash point of 360°C (680°F). 天ぷら油 tempura oil is usually a mix of sunflower and sesame oils and is listed on this site as igniting from around 360 – 380°C (680-716°F). Both of these are somewhat far from the up to 190°C (370°F) I was aiming to maintain, but drips of oil falling onto the flames can cause fires even when the main body of oil in the pan is at a safe temperature.

So point number one: be safe, use a thermostatically controlled electric fryer if possible, and check how much oil your pan permits for safe use (usually no more than a third full). Don’t over-heat the oil causing it to smoke, and if it starts to smoke, then stop and turn off the heat before it sets alight. Never throw water on boiling oil and don’t try to move a pan that is on fire. Old advice about damp tea-towels is no longer recommended in the UK, the official recommendation of the fire service in the event of a pan on fire is to turn the heat source off if it is safe to do so, then get out and stay out and call emergency services.

Electric deep fryers are available in Japan, but many people still use the traditional type of tempura pan I used, and hence the most common cause of kitchen fires in Japan is from cooking tempura. The official line on kitchen fires from many ward offices is still to use a wet towel to extinguish a fire, and there are things such as this fire extinguishing flower that you throw into the pot, other advice recommends using a lid to try to extinguish a fire. Though I hope you'll never need it, the fire service number in Japan is 119. Some useful info here on the US embassy's site about calling emergency services in Japan.

Secondly: be a mensch, don’t pour the used oil down the drain. The oil will solidify and can block drains and sewage pipes. In Tokyo we are advised by our ward office to let the oil cool and pour it into a container such as an old milk carton that has scrunched up newspaper or fabric inside it, then tape the carton shut and put it in with your burnable rubbish. You can also get an oil coagulant which allows you to put the oil in solid chunks straight into the burnable rubbish.

You can use your oil a few times for frying, particularly if you strain it each time. But the oil will eventually become rancid with use and exposure to air. (Though apparently, the frequently retold rumour that repeated use of cooking oil produces of trans fats is untrue as long as the oil was not partially hydrogenated to start with. If you want to check the Japanese label of your oil, partially hydrogenated in Japanese is 部分水素化 bubun suisoka).

I've read on Japanese forums discussing tempura that using oil 3-4 times is a pretty good rule of thumb, but it depends on what you fry. If the oil becomes dark and starts to smell bad then it’s certainly time to throw it away.

Phew I had no idea when I started this post that it would turn into such a mammoth investigation of frying! Goodness me. Enjoy!


Thursday, April 11, 2013

Japanese bread flour tests - koumugi, haruyutaka and someiyoshino

I finally got around to testing out the remaining Japanese white bread flours I’d ordered. After the initial surprisingly different taste of the kita no kaori flour blend that I tested a little while ago, I wanted to make a few loaves at the same time using exactly the same method and starter, to compare them side-by-side like a wine tasting.

My flight of sourdough boules for taste-testing

This necessitated the purchase of a few more large bowls and I was pleased to find the large 100 yen shop in Harajuku had bowls big enough to do the trick. Sourdough starter can react with metals (that link is a good read right there), and so go for plastic or glass bowls when you can, and if your jam/mason jars have metal lids, sneak a layer of clingfilm between the lid and the jar when you loosely (to let the gasses escape) affix your lids to avoid rust in your lid and off-notes in your starter.

The flours I tested were as follows:
  • A 日清製粉カメリヤ / Nisshin strong flour, camelia. (My control, the regular flour I've most frequently used to date, made from North American wheat)
  • B キタノカオリ / Kitanokaori blend is the one I tried out earlier (from Hokkaido, name meaning 'fragrance of the North').
  • C ハルユタカ / Haruyutaka (from Hokkaido. The name is usually written in katakana, but assuming that 'haru' and 'yutaka' have their usual meanings, this would translate as something like ‘spring abundance’ maybe?).
  • D 香麦 / Koumugi (from Hokkaido. The name sounds a little like the Japanese for wheat 小麦 / komugi, but with an extended ‘kou’ sound. It’s the same ‘kou’ kanji character as is used in perfume 香水 / kousui and so the name sounds like it means ‘fragrant wheat’).
  • E ソメイヨシノ / Someiyoshino (from Kyushu, the name is a type of cherry blossom).
  • F Shipton Mill No. 1 organic white bread flour (UK wheat, which I tested previously.)
– I told you they had great names. ;) There is another I haven't tried yet called 春よ恋 / Haruyokoi which is also from Hokkaido, and the name appears to be a play on words. It sounds like the name of a drama, a song and manga 春よ来い / haru yo koi which means ‘longing for spring’ or ‘come on, spring!’ but has instead the 'koi' kanji for love and so means something more like ‘spring passion’.


On with the tests! Based on the protein and ash content I might have expected the kitanokaori blend to behave similarly to the Shipton Mill flour I liked so much when I tried it in the UK. There was certainly a big difference in taste between the two however. In terms of other notable points, the someiyoshino flour was the highest protein of all those I've been testing, at 13.9% and Haruyutaka the lowest at 11.3%. The Shipton Mill flour had the highest mineral content and Nisshin camelia was the most refined white flour with the lowest ash content of all.

My starter was a little more lethargic than usual for these tests, with me not perhaps giving it enough warming and culture-proofing before I used it but with enough time it leavened the dough enough to produce some reasonable half-sized loaves.

For the method I split a regular 700g-ish basic sourdough loaf recipe in half and made 4 test boules using the same amount of starter, water and salt. I mixed in 200g of flour to start with and reserved 45g back to add during kneading depending if it needed it. Of all the doughs the control (Nissin) was the wettest and it took the whole 45g of additional flour. Koumugi was the driest flour to-touch and stiffest dough and so I only ended up using an additional 8g more. This dough was springy during kneading, but tore quite easily compared to the others which were more stretchy.


During their overnight proof the Nissin control flour dough and haruyutaka had spread out the most in their bowls, and koumugi remained the highest.

Tall koumugi is 2nd from the back

This remained the case after shaping final proof and baking - Haruyutaka was the flattest, most spread-out loaf and koumugi the tallest. Haruyutaka also had a noticeably more pliable crust than the other breads.

Koumugi crust

Someiyoshino crust

Other remarkable differences were that koumugi had a strangely flaky crust, in that some of the bubbles in the crust of the dough had shattered, something I hadn't seen before (1st photo above). Someiyoshino, the highest protein flour had unusual gelatinous starchy markings in the slashes on the crust (2nd photo above). The Nissin control loaf had the tightest crumb and mainly small bubbles with just a couple of larger ones, though this could be a feature of me having to shape it a few more times than the others, it being quite a slack dough. (Photos below, left to right are Nissin control, Haruyutaka, koumugi and someiyoshino. Same order also in the photo set below.)


Someiyoshino was the most remarkably different-tasting bread of the batch, it had a slight grassy taste and a slightly soapy mouth-feel on the finish. Still, it was a little more subtle tasting than the kita no kaori flour I tried out a few weeks ago and wasn't unpleasant.

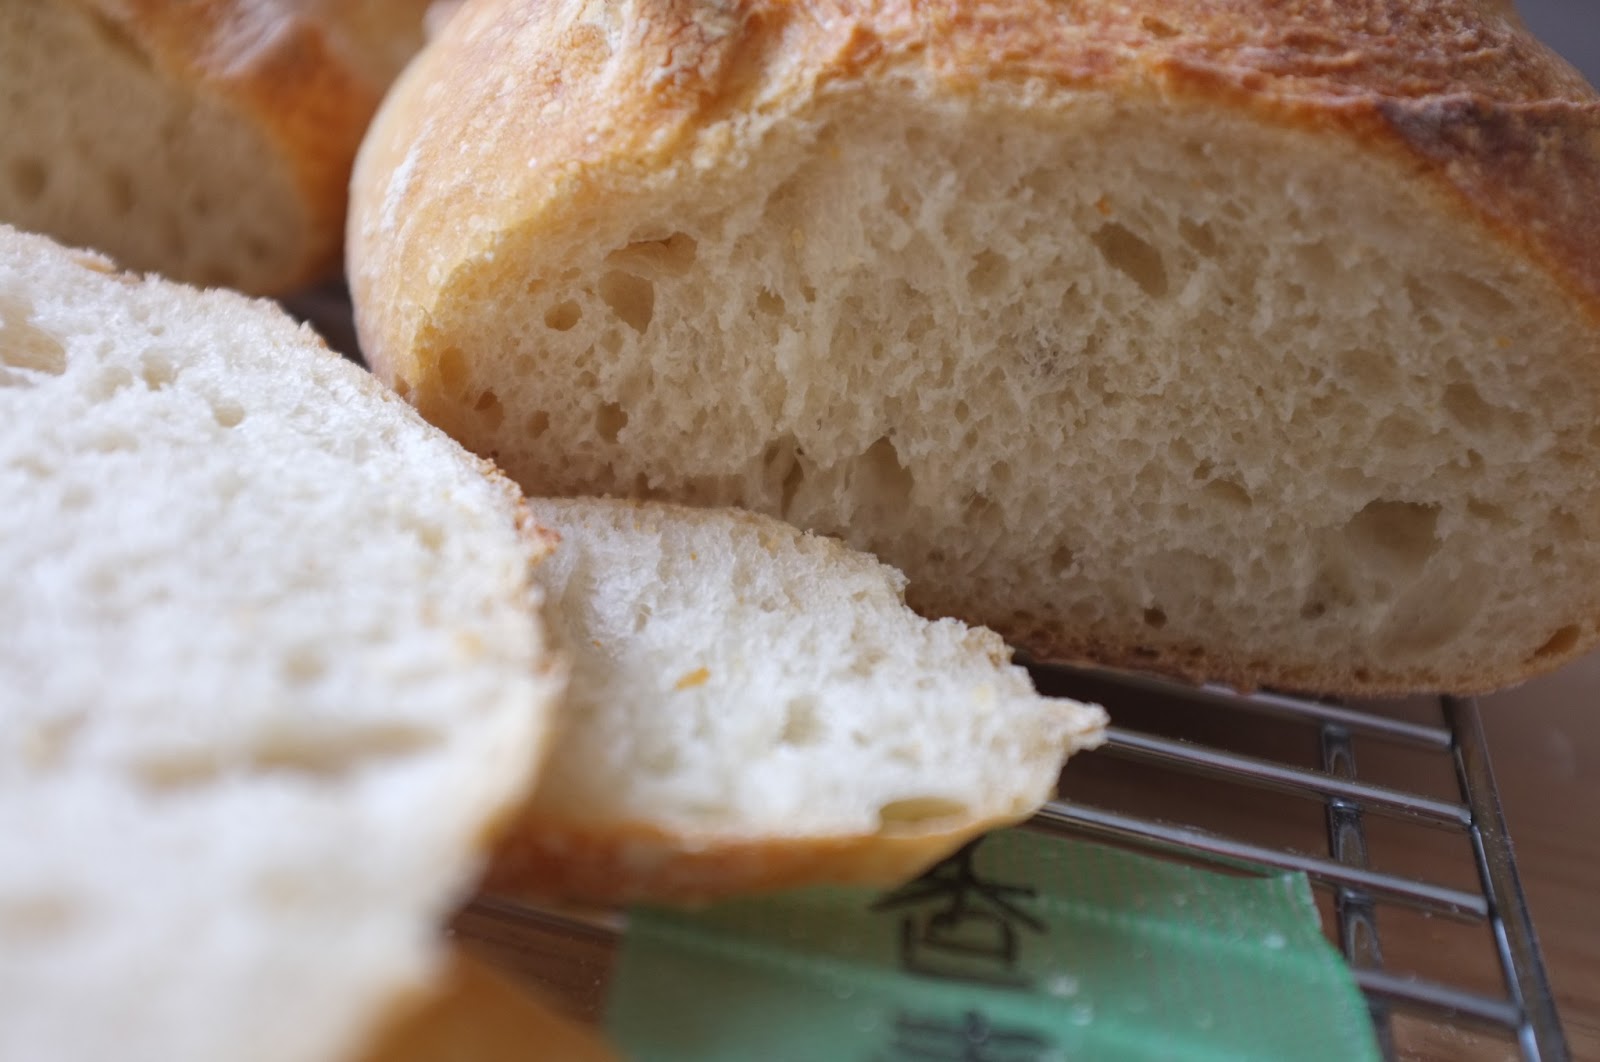
Haruyutaka produced the palest loaf in this batch and was the closest in taste and texture to the control Nissin loaf. The crumb was the holey-est (holiest?) crumb with a few more bubbles on the large-side. None of the loaves were remarkably artisan-level holey, but that's fine with me as I get to keep more of the topping on my slice..

Koumugi was my favourite of the Japanese flours tested to date. The crumb was stretchy and springy, the loaf had risen the highest of the lot and there were no off-notes to disturb the enjoyment of the slight sourdough tang. The crumb was quite evenly bubbly with medium-sized holes.


I'd like to try out a few different recipes with these flours, see what they are like with different toppings or how they perform as flatbreads. I haven't yet had quite the same kind of epiphany I had with Shipton Mill flours, but they have made nice sourdoughs and I'll give it a few more tries!

Comparing the holes in the crumb