

The cake is connected with the origins of British afternoon teas - Queen Victoria developed a taste for continental-style afternoon refreshments thanks to the fancies of one of her ladies-in-waiting, and this is said to have become one of the Queen's favourite cakes. The 7th Duchess of Bedford had taken to having tea and small snacks in her rooms, to banish "that sinking feeling" during the late afternoon, and this developed into an intimate social event with friends inviting each other for "tea and a walking the fields". Sigh. Ever get the feeling you were born in the wrong century?
The basic recipe is elegant – you use the same weight of butter, flour, and sugar as the eggs, weighed in their shells. Then there is just the issue of baking powder, whether to add vanilla flavouring, and whether you'll be traditional and spread it with raspberry jam only, be lavish and go with a layer of whipped cream or buttercream on top of the jam, or do something interesting with fresh fruit, lemon curd and other crazy things. :)
 |
| The traditional adornment is just sprinkled caster sugar |
A word or two about baking powder.
Most recipes call for self-raising flour, which is just plain flour with baking powder and salt already added. Then, depending on the recipe, additional baking powder is sometimes added. I compared a few well-known recipes to see the estimated total amount of baking powder per gram of flour and you can see there is quite a range. (Calculations based on assumption that self-raising flour has 5g of baking powder in every 100g, and that a teaspoon of baking powder is 4g.)
Total baking powder per 100 grams of flour in each recipe:
- Delia Smith’s all-in-one sponge cake: 5g
- Mary Berry’s perfect Victoria sandwich: 9g
- Felicity Cloake’s perfect Victoria sponge: 7g
- Lilly Vanilli’s ultimate pillow soft vanilla sponge: 2g
- Hairy Biker's Victoria sponge (from WI website): 7g
Mary Berry's is the highest, and is probably because she uses the all-in-one method of mixing which does not cream-in any air pockets to help with the rise. I started off with the Mary Berry 9g/100g baking powder vs flour ratio for the mixing method tests below, since the Victoria sandwich is her specialty, having made hundreds when working as an oven tester, but surprisingly I found it was too much. This at least gave me the opportunity to demonstrate to you that adding too much baking powder will cause your cake to dip in the middle:
 |
| "That sinking feeling" caused by too much baking powder |
6 cakes later (yep, 12 layers, baked one at a time.. I can't wait to have a bigger oven at my disposal) having the amount of baking powder sorted, I wanted to see what the difference would be in using the various mixing methods available. Keeping the recipe amounts and cooking times etc. constant I tested the traditional 'creaming method' along with the 'all-in-one method' that is frequently described as foolproof, and a newly popular 'reverse creaming method'.
Victoria sponge cake recipe:
- 3-4 eggs at room temperature, weighed in their shells (3 large eggs came to 200g for me)
- Same weight of butter
- Same weight of plain flour
- Same weight of sugar (caster sugar is best, see here for advice on sugar in Japan)
- 12g of baking powder (or amount of flour x 0.06)
- Couple of splashes of vanilla oil (or essence, or scrapings of half a vanilla pod)
- Pinch of salt
- About 4 tablespoons of jam and caster sugar to decorate
- Preheat oven to 160°C (170/180°C if not a fan oven)


Method options (pics above show methods 1, 2 and 3, from left to right.)
1 Creaming method
- Beat softish butter (about 15-18°C) until slightly lighter in colour, add sugar and beat well until light and fluffy. Good creaming tips here.
- Add lightly beaten eggs and vanilla oil into the butter bit-by-bit, adding a teaspoon or so of flour if it starts to curdle.
- In a separate bowl combine sifted flour with baking powder and salt and then add them to the egg mixture, folding in gently and slowly until just combined.
- Split batter between 2 tins and bake on the same shelf for 25 minutes.
- Cool completely, place one layer upside down and spread with jam. Cover with second layer and sprinkle sugar on top.
 |
| Rev-cream may look curdled, but will be fine. |
2 Reverse creaming method ("2-stage method")
- Combine sifted flour with baking powder, sugar and salt in stand mixer bowl with paddle attachment.
- Add cubes of soft butter (about 18-20°C) and beat at slow then medium speed until just a few pieces remain.
- Add lightly beaten eggs and vanilla oil into the mixture bit-by-bit, scraping down the sides once or twice.
- Split batter between 2 tins and bake on the same shelf for 25 minutes.
- Cool completely, place one layer upside down and spread with jam. Cover with second layer and sprinkle sugar on top.
 |
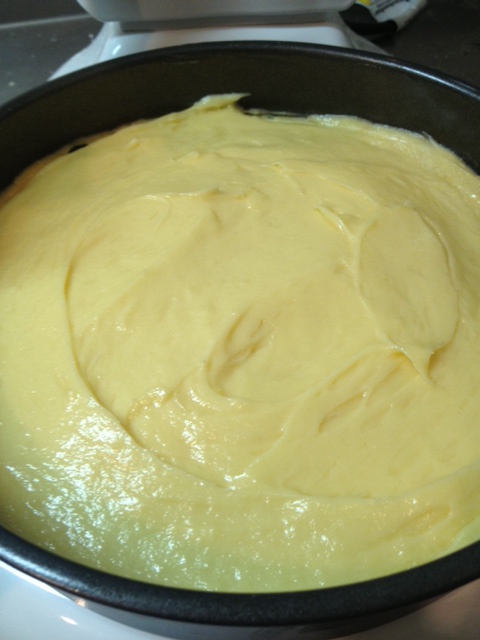
| All-in-one method. But put your flour in last. |
3 All-in-one method
- Have your butter soft (about 18-20°C). Combine sifted flour, baking powder and salt.
- Dump all ingredients in a large bowl, flour mixture last to avoid patches of dry flour being trapped at the bottom.
- Beat on slow then medium speed to avoid a mess, until just incorporated.
- Split batter between 2 tins and bake on the same shelf for 25 minutes.
- Cool completely, place one layer upside down and spread with jam. Cover with second layer and sprinkle sugar on top.
 |
| Pulling away from sides of pan, browned, skewer comes out clean |
Extra tips:
- Whisk/stir the sifted dry ingredients together to distribute the baking powder evenly.
- Creaming and all-in-one method are possible to make by hand or with a hand-held mixer (just use a large bowl and start off at low speed to avoid the flour going everywhere), reverse creaming is probably best with a stand mixer.
- The batter should be easily spreadable in the tin rather than free-flowing. However, if the batter is very thick, add a little milk to loosen it.
- It's fine to have one layer hanging about for half an hour, better to do this if your oven won't fit two tins on one shelf, so that they will bake evenly.
- If you're using whipped cream as a filling, you want it fairly stiff to hold the weight of the top layer. Use a cream with a high fat percentage such as 45 or 48%. If you want to be particularly neat, piping the cream in a spiral on top of the jam, starting from the outside edge is a good way to get a firm even layer. It's also fun to have it dolloped on in a more rustic manner.
 |
| 4 tablespoons of jam was plenty for me |

Verdict on the 3 mixing methods (all sets of photos show methods 1-3, lined up from left to right)
First things first, the taste of these cakes was identical, even the initial sunken tests tasted good. :)
The all-in-one method is definitely the simplest, it is pretty fail-safe provided your butter and eggs aren't too cold. Most Victoria sponge recipes these days seem to use this method.

I noticed that an attractive frill around the top edge of the sponges (image above) tends to develop more when using the all-in-one method than others, not sure why this is the case but I quite like it. I found this cake had an ever so slightly coarser crumb, although it had a nicely domed top like the creaming method cake.


The creaming method has the potential to deliver the highest cake of the lot, since you're whipping air into the butter with the sugar at the beginning and this adds to the lift brought about by the leavening agent. Certainly the center of the creaming method cake was the highest of the 3 in my test (6.3cm vs 4cm at the edges!).


The one that was more noticeably different, although only if you were looking for it really, was the reverse-creaming method. This cake had the finest crumb, meaning that the grains of sponge and most of the holes between them appeared smaller, more evenly distributed. The effect was a little more lacy than the others. The top of the sponge was decidedly flatter too (5 cm in the center, 4.5 cm at the edge), a useful feature if you are planning to decorate the top with cream and fruit.


It was a smarter looking cake, though a bit less traditional than the gently sloping hillocks that were the other two. The idea behind reverse-creaming is that by coating all the flour grains in fat before liquid is present, you inhibit the development of gluten, and so the cake should be the least tough and not remotely chewy.
This method is often attributed to Rose Levy Beranbaum who popularised it in 1980's, but is cited in The Science of Good Cooking as being invented in the 1940's by General Mills and Pillsbury. The Lilly Vanilli pillow cake also uses a similar reverse-creaming method (although my test cake uses this method, it doesn't have the same high flour and sugar to butter ratio of Vanilli's recipe and so is definitely more of a Victoria sponge than a pillow cake).
So in summary, use the all-in-one method for speed and reliability, reverse-cream for fine crumb and sturdy structure for layering, and use the traditional creaming method if you want to aim for height.
I hope this was helpful or interesting. Aside from the nostalgia trip, these are just lovely cakes to make and eat, I particularly like the whiff of caramel when you're peeling the backing paper off the sponges. It would be an excellent offering at a picnic - robust enough to survive transporting to the park, and the variety without cream should hold up particularly well even on a sunny day.
And should you, horror of horrors, find yourself with Victoria sponge left-overs, you could chop it up and turn it into a rather lovely sherry trifle, especially if it's a little stale.

No comments:
Post a Comment