Wednesday, October 31, 2012

My first practice catering gig!

A friend asked me to do the desserts for her sayonara tea-party. Apart from being able to contribute something nice for my friend’s special day, I thought it would also be a good chance to practice a bit of the time-management and planning side of running a food business.


The order included a couple of Victoria sponge cakes, 2 dozen cupcakes, shortbread jam heart biscuits, some gluten-free chocolate sparkle cookies and a couple of carrot cakes. Oh! And 20 mini lemon meringues. I also did a few mini scones to be had with the rest of the jam.


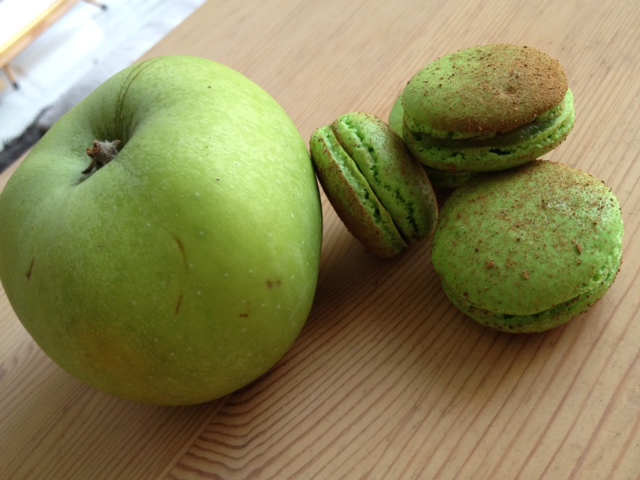
It was quite a challenge trying to complete this order in my tiny 1-shelf oven, which necessitated the making of things in very small batches. That’s right folks, jammy heart sandwich cookies can only be made 6 at a time – that’s 6 halves at a time, and so an order of 20 take 7 trips to the oven.. and all the layer cakes have to be made a layer at a time too.. goodness.


Advance calculations I made estimating the time needed to prepare and bake the order came to about 24 hours (!). This was mainly due to the aforementioned diddy oven issue, but also because there is a lot of variation in the order as opposed to bulk production of the same thing. Just to be on the safe side I very happily took a day off my office work and also got a head-start on some things the night before the main production day. Tomas Haas' chocolate sparkle cookie dough for example, needed to be chilled overnight anyway. 


I had images of my (also tiny) home kitchen looking like a bomb-site, and surfaces around the house needing to be stacked with various cooling and packed-up goodies, but in the end tidying up as I finished each part meant it wasn't unmanageable. With the help of decent sized cake boxes, large Tupperware and a couple of large IKEA bags, I was also able to transport the whole order (and two bottles of bubbly) by taxi with the help of a friend. We also managed to avoid throwing the whole lot on the pavement outside the party girl’s flat, another image I’d been trying to push out of my mind. One other thing I learned is that being on your feet all day is hard! I'll have to start physical training for my transition from office job to baker. :)

Since there were 2 of each full-sized cake I decided to do something a bit different with each. One of the carrot cakes was made with walnuts and the other with pecans.


I did a traditional Victoria sponge that just had jam inside (home made strawberry champagne jam), and another with raspberry jam and chantilly cream.

Victoria sponge cake, a classic

The more traditional filling, with an experimental decoration

Sift icing sugar through doily, remove carefully!

Half the cupcakes were in my friend’s favourite style, with a cream cheese frosting topped with blueberries and edible flowers, and the other half were moist chocolate cakes with a dollop of ganache in the center, topped with a simple vanilla butter cream frosting and curls of dark chocolate.


All in all it went very well! There was plenty to go around and people enjoyed having something ‘nastukashii’ or nostalgic aside from just cupcakes, there was talk of Grandmothers and time in the kitchen as a child. Japanese friends got to try things like the Victoria sponges that they’d seen in recipe books but not tasted before. Everyone ate too much cake... hmm.

Natsukashii!

There were a couple of things I’d do differently – not pipe the meringue down into the pastry cases to avoid a couple of them cracking on expansion of the meringue, and maybe a thicker filling to the carrot cakes, but my friend was thrilled and I was happy with the items I took. Definitely be easier with a more professional kitchen. ;)

Friday, October 19, 2012

Getting a food business permit - visiting the public health center


This week I got around to paying a visit to the Minato-ku public health center / みなと保健所 生活衛生センター / Minato Hokensho seikatsu eisei senta. A short walk from Azabu Juban and sandwiched between large Mita hospitals, the health center is in charge of inspections for food businesses, and deals with various other public health issues for the Minato ward area including disease control, pest control, hygiene, and food regulation.

On the 5th floor there is a long counter with stations for consultations in Japanese regarding food businesses - if your premises is in Minato ku this is where you will need to come to apply for an inspection in order to get your business permit. If you are at that stage already, there's more information on that process in my previous post.

I'm not at the space-hunting stage yet, but wanted to check a couple of things to help with planning my business model as the requirements might impact the kind of space I will need to look for.

I would like to have a multi-purpose space - which could be a cafe while also being a workshop for the bakery and orders, as well as allowing me to hold practical lessons - but I learned that a local bread school were not allowed to use their teaching kitchen as a commercial space, and so I wanted to know exactly why. It turns out that the problem is with who can enter the kitchen / 厨房 / chuubou - if I keep my kitchen quite separate from the café area through the use of a counter and a swing door for example, and do not allow customers or students into the kitchen, then I can use the café area outside business hours to teach. Of course this will mean I'll have to get creative with using tables as workstations and make sure only me and my staff ferry trays and things to the kitchen, but it looks like there may be a way to make this work, legally, in a small space.

This also means that if you are running a bakery from home in Japan, apart from your facilities meeting the confectionery business permit requirements, they will also have to be in what amounts to a second kitchen to be used solely for your business activities. The health center staff confirmed that a business permit will not be granted to a food business using their regular domestic kitchen because family members using the space and your own domestic food preparation presents a health hazard for a commercial food business.

Basic requirements for a food business permit

On the back of the application is a list of the basic requirements you'll need to meet, along with diagrams. I've done a rough translation here, but do check with your ward office as requirements are different for each area (these from Hiroshima are very nicely illustrated) and may change.
  1. Building – made out of suitably durable material
  2. Plan – walls and boards etc. made of suitable material and arranged appropriately for intended purpose
  3. Floor – comprised of easy to clean and water resistant material
  4. Interior walls – at least the bottom meter should be water resistant and washable
  5. Ceiling and walls – made of easy to clean material
  6. Ventilation – there should be separate ventilation for customer area and kitchen
  7. Kitchen sinks – need to have at least 2 (of at least the dimensions in the 1st image below)
  8. Hot water – to aid hygiene there needs to be hot running water
  9. Staff hand-washing sink – need to be in the kitchen and in the visitor area (of at least the dimensions in the 2nd image below)
  10. Hand sanitation – should be provided at the staff hand-washing sink (9)
  11. Refrigeration – units need to be big enough to hold the required amount of chilled food appropriately
  12. Temperature regulation – thermometers should be placed in the refrigeration/freezing units and in the kitchen area
  13. Storage – there is shelving of adequate size to store the number and sizes of vessels required for the business 
  14. Waste disposal – bins are of sufficient size and have lids
  15. Cleaning equipment – have their own storage area
  16. Changing room or locker – is outside the kitchen area
  17. Customer area – should be positioned so as not to interfere with food preparation areas, and a toilet should be provided


Much of what they wanted to emphasise to me when I visited was about the sinks - that in addition to a staff hand-washing sink, there should be two kitchen sinks for a restaurant/cafe type permit, or one kitchen sink if it was only a confectionery business without eat-in areas, and that these all had to meet the specified sizes.

Since I was there, I took the opportunity to ask a few additional things. The staff who helped me were amused at how strict the international examples I came up with seemed to be - apparently there is no legal requirement in Japan for egg products to be brought above 71 °C, and there are no regulations about the weight of bread. Grease traps, which are a legal requirement for commercial kitchens in many countries are not legally required in Japan (at least, according to the staff I spoke to), but your building owner may want you to have one fitted, and it makes sense to adhere to best practice regarding waste fats, oil and grease disposal even if it isn't a legal requirement.

Finally, I checked but there are currently no resources available in English to help with the process, and all consultation is in Japanese. The staff at the Minato public health center said that other ward areas may provide this information, so if you are in another area it's worth asking!

Thursday, October 11, 2012

Bramley apple macaron recipe, and how to get your hands on Bramleys in Japan

Since my previous Bramley apple post, in which I described my delight in finding proper cooking apples in Japan, the grower who supplied them has retired and I’ve been redirected to other sources. As the apple-picking front moves across Japan again this year I thought I’d share the updated sources and things I’ve been experimenting with Bramley-wise. (Check here for additional exciting Bramley updates.)

Huuge cooking apples, in Japan!

The first place to grow Bramley apple trees in Japan was Obuse, Nagano, in 1991. The story, as reported here, is that apple grower Arai-san from Obuse fell in love with the taste of apple pie made with Bramleys while visiting England, and organised for them to be grown in Japan. A man after my own heart! Mr Arai and Obuse town representatives have just visited the original 200+ year old Bramley apple tree in Southwell in Nottingham in August this year, and you can see photos of the expedition and a write-up in Japanese here.

You can buy Bramley apples in Japan from Obuse-ya. They harvest in August, and sell until stocks run out. I had to email them in Japanese requesting a fax form, but they are in the process of updating their online shop, which will be much handier and seems as if it should be ready during October – I’ll update this post with the link when I see it’s live. The prices available when I ordered were 2,100 yen for 2kg, 3,150 yen for 5kg, and 5,250 yen for 10kg, including delivery. This is what 5kg looked like (the picture is a little deceptive, those apples are in fact very large! They weigh almost 400 grams each.)

From Obuse to Tokyo, right to my door

The Hokkaido distributor for the orchard that supplied my apples last year is now this company. These apples are available from October and are 2,700 yen plus delivery for 9kg.

Having ordered now from both Obuse and Hokkaido, I can say the quality (and size) of the fruit is tremendous, quite possibly better than you'd find in your local supermarket in the UK!

Apple pie is my favourite thing to make with Bramley apples, but they are also fantastic as part of a stuffing or sauce for roast pork, and are a key ingredient for making your own Christmas mincemeat. Recently, since I’ve been going a bit macaron-challenge mad, I also tried Bramley apple macaron...

Strawberry and raspberry jam are common macaron filling flavours so the idea of using Bramley apple jam isn’t too outlandish. I made the shells with yellow and green powdered food colouring, and cinnamon, and they are sandwiched with Bramley jam and faux French buttercream. Butter and Bramley apples are such a great flavour combination in apple pies, I wanted to see if the resulting macaron might remind me a bit of apple pie :)

Bramley apple macaron, dusted with cinnamon

Recipe: the macaron shells

Here is the base macaron shell recipe from BraveTart, adapted to become Bramley apple macarons:
- 115g almond flour
- 230g powdered sugar
- 144g egg whites (about 4-5 eggs, but do weigh them)
- 72g sugar*
- 2 tsp vanilla extract
- 1/2 tsp cinnamon
- Powdered green and yellow food colouring. 3 scoops each of the tiny spoon that comes with the bottle, maybe 1/5 of a tsp.
- 1/2 tsp (2g) salt

* I’ve had best results so far from using imported caster sugar. The most popular form of caster sugar-style sugar here, 上白糖 / jyohakutou, is sweeter than regular sugar used in the UK and the US, has a higher water content and is less pure (lower calories though!). While it is fine in many cake recipes, even seems to aid in browning, when I've made macaron and pavlova using johakutou I had lots of crackage and strange behaviour. Granulated sugar / グラニュー糖 / guranyuu tou might give you better results if you can't get imported caster sugar near you as it is a purer sugar compared with jyohakutou (more information here in Japanese). I’ll try that next.

Method:
  • Prepare your baking paper with lots of identical and evenly spaced circles. Turn the parchment over to avoid pulling pencil marks off the paper with your macaron shell ;)
  • Sieve the almond flour and powdered sugar together in a large bowl. Stir in the powdered food colouring and mix it in well. You won’t see much colour difference while all the ingredients remain dry.
  • Tip the salt and the sugar into the egg whites in a large bowl and set your timer (iPhone) to whisk on 3 minutes at low speed, 3 minutes at medium and 3 minutes at high speed. I used an electric hand whisk. Add the vanilla essence and beat for a further minute (as BraveTart’s Stella says, “to show it who’s boss”).
  • Tip the dry ingredients into the beaten egg whites and fold them together. This is the stage that needs practice, as they need to be neither undermixed (you’ll get cloud-like and hollow meringues) or overmixed (likely to crack on top, difficult to pipe and harder to peel from the paper). See my previous macaron post for pictures of what you’re looking for, but trying it out a few times will be the best way to know.
  • Wrestle the mixture into a piping bag with a wide nozzle and pipe uniform sized blobs of mixture onto your awaiting baking paper. This is where you find out if your batter is adequately mixed – your blobs might start off a little hershey’s kisses-shaped, but should ideally become quite smooth on top within a few minutes of piping.
  • Rap the tray on the work surface sharply a few times to burst the bubbles that will spoil the surface of your shell and potentially cause cracks.
  • Sprinkle them with more cinnamon powder through a sieve, and wait for the surface of the shell to become dull and farily dry. Stella says this waiting step is unnecessary, but I’ve found that the ones I left the longest had the best feet, and I've also heard that it can help make the shells shiny. In my kitchen at this time of year I need to wait at least 30 minutes and no harm has come to those batches waiting over an hour.
  • Preheat oven during this waiting period. I get the best results at 130°C you might find you need a little higher or lower.
  • Bake for 18 minutes. When they are ready to come out the feet shouldn’t squidge when you press them lightly from the top. Leave them on the paper to cool and they will come off more easily. Let them cool completely before filling.
  • Assemble the macarons by matching up similarly sized shells and spreading a little jam on one half and piping a blob of buttercream on the other (recipes below). Sandwich together and put in an airtight box in the fridge to set the filling. They’ll taste even better the next day, and you can also freeze them.


Recipe: the apple jam and buttercream fillings

Bramley Jam
- 1 biggish bramley apple
- Between 10-50g of sugar, depending how tart your apple is
- A few squeezes of lemon juice
- A splash of water to help get things going

Method:

Peel and core the apple, cut into chunks and heat over a medium flame with the rest of the ingredients, stirring frequently until the mixture has reduced into a thick puree. You want it quite thick and reduced so as to not make your macaron shells too wet - it took me about 30 minutes. Test the flavour along the way to see if you think you want more sugar for a less tart jam. Cool completely before using.

Faux French Buttercream (From BraveTart)
- 1 vanilla bean
- 100g sugar
- 100g egg yolks (from about 5 eggs)
- 1/2 tsp salt
- 300g unsalted butter, room temperature

Method (see the original post on BraveTart here, with video!):
  • Scrape vanilla bean and rub seeds into the sugar.
  • Whisk the vanilla sugar into the egg yolks, along with salt.
  • Place the egg mixture bowl over a pot of barely simmering water, stir and scrape constantly until the mixture reaches 65°C. Do this slowly and patiently, it takes some time. Remove from heat and whisk at medium speed until the bowl is cool to the touch. It will roughly double in volume.
Add the very soft butter to the cooled egg yolk mixture, one chunk at a time. When you’ve added all the butter, scrape the bowl down, then mix for another minute. This amount is about a third of the batch size on BraveTart, but is still more than enough for 2 batches of macaron. Keeps for up to 6-months in the freezer in a ziplock bag.